Cute Aesthetic Easy to Make Crochet Wallet
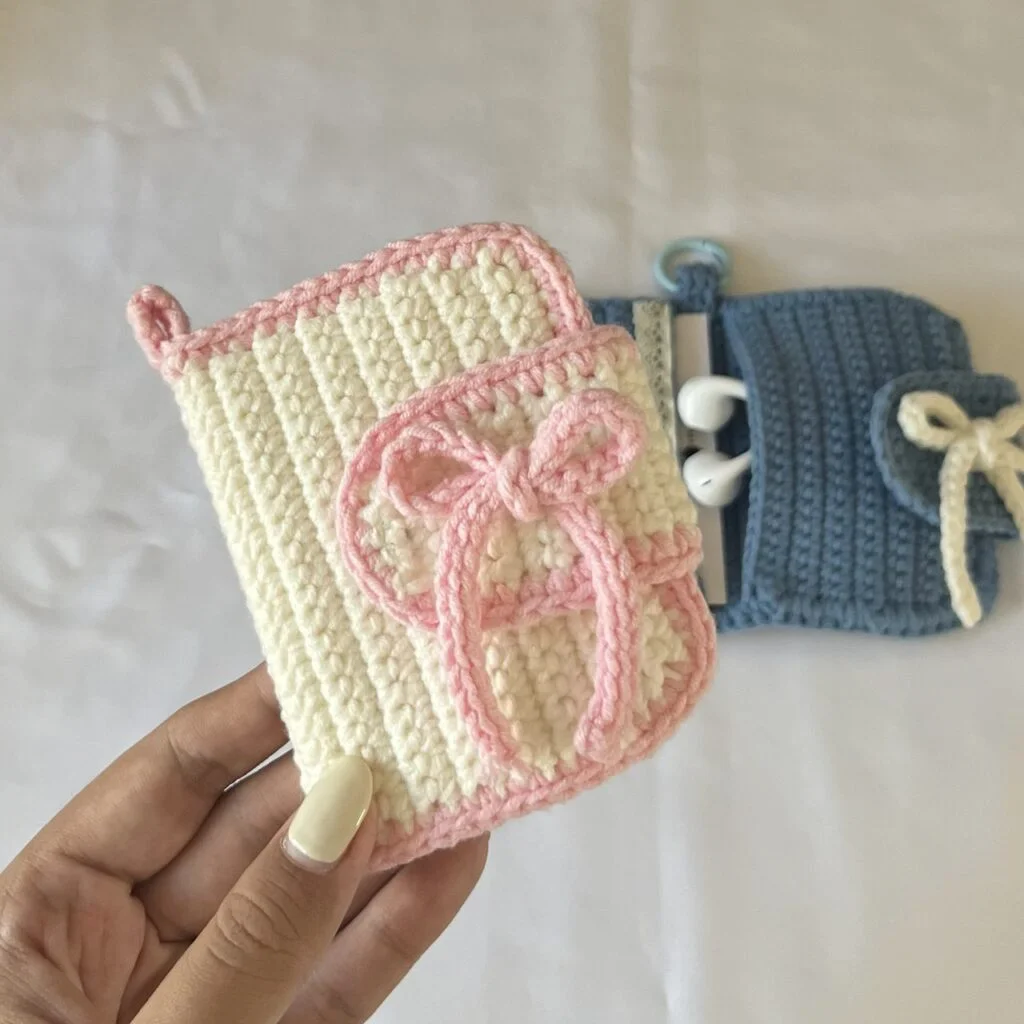
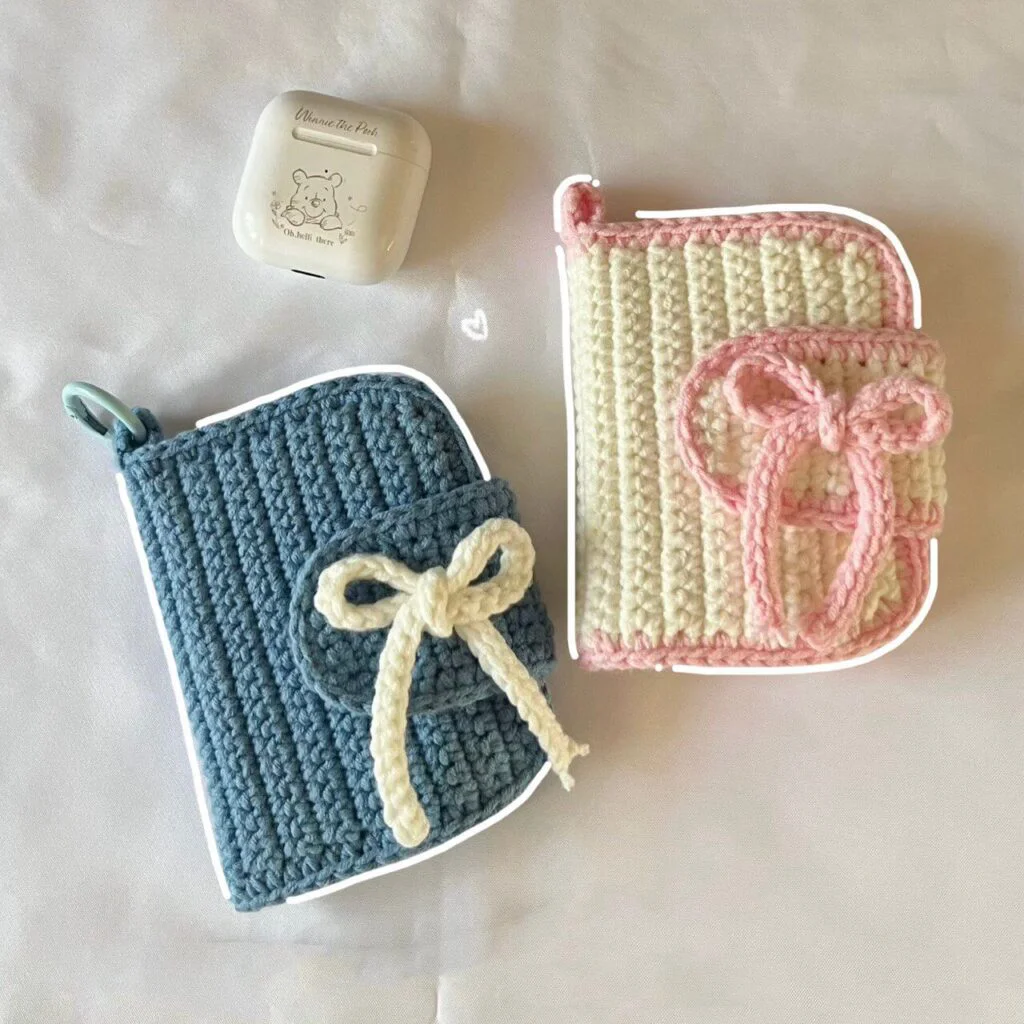
Welcome back to another delightful crochet project! Today, we have an absolutely adorable and incredibly practical pattern for you: a Cute and Aesthetic Crochet Wallet! If you love crafting functional items that you can actually use in your everyday life, this beautiful and surprisingly simple wallet pattern is going to be your next favorite make.
This pattern is wonderfully adaptable and perfect for stash busting, allowing you to whip up stunning and useful accessories in record time. While the instructions are tailored for their classic size, you can easily play with different color combinations and embellishments to make it uniquely yours! Grab your hooks, settle into your favorite crafting spot, and let’s dive into making this wonderful crochet wallet!
Materials Needed
- I used Xuefeier milk cotton yarn for this project. You can use any type of Cotton, Acrylic or Sport yarn in any color of your choice. You will only need around 100g of yarn.
- 3mm & 4mm(optional) crochet hook
- stitch markers
- darning needle and scissors
Crochet Abbreviations
Abbreviations are in US terminology.
- Ch – Chain
- st – stitch
- R – round / row
- sc – single crochet
- inc – increase
- dec – decrease
- slst – slip stitch
- *- repeat
- [] – total stitch count in each round/row
Do not miss out any details! Open this video as you crochet along to make the process more effective and time-saving.
The Body Panel
Start with a slip knot and make 19ch.
R1 Starting from the 2nd ch from the hook, 1sc into each ch [18]
R2 Ch1, Turn, 1inc, 16sc, 1inc [20]
R3 Ch1, Turn, 20sc [20]
R4 Ch1, Turn, 1inc, 18sc, 1inc [22]
R5-R30 Ch1, Turn, 22sc (26 rows) [22]
R31 Ch1, Turn, 1dec, 18sc, 1dec [20]
R32 Ch1, Turn, 20sc [20]
R33 Ch1, Turn, 1dec, 16sc, 1dec [18]
R34 Ch1, Turn, 18sc [18]
- Cut the yarn.
Pockets (make 2)
Start with a slip knot and make 19ch.
R1 Starting from the 2nd ch from the hook, 1sc into each ch [18]
R2 Ch1, Turn, 1inc, 16sc, 1inc [20]
R3 Ch1, Turn, 20sc [20]
R4 Ch1, Turn, 1inc, 18sc, 1inc [22]
R5-R15 Ch1, Turn, 22sc (11 rows) [22]
- Cut the yarn.
Assembly
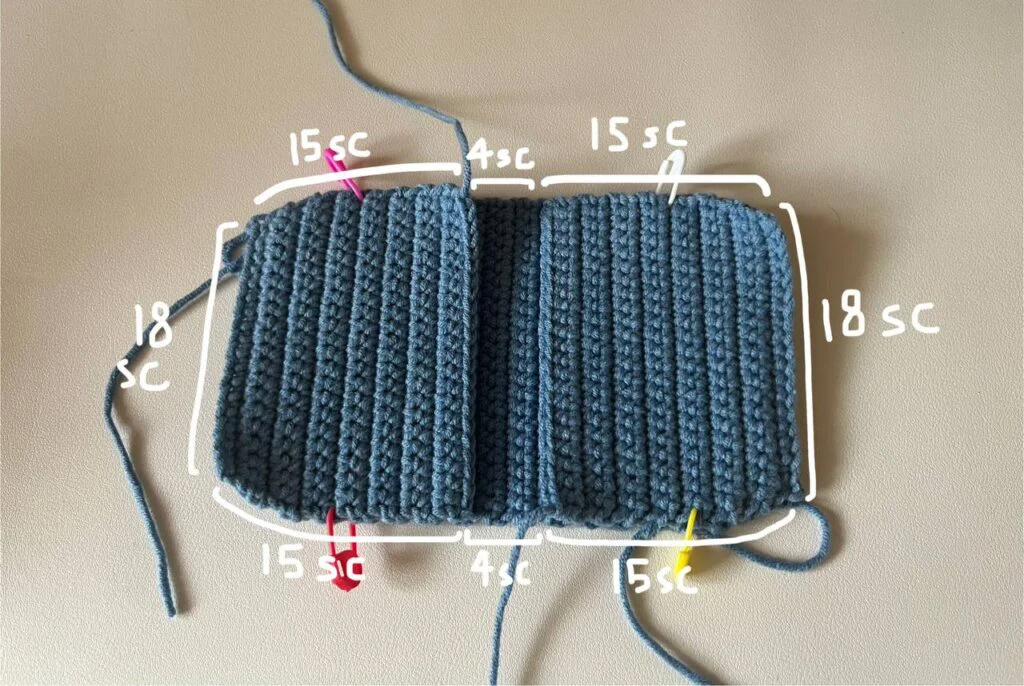
- Place each pocket on either side of the body panel as shown in the image below.
- Make that the rows are aligned and positioned directly against one another.
- Begin at the corner of the last row of the body panel, (or at any starting point of your preference), and insert your hook through both the body panel and the pocket.
- Watch this part of the tutorial for a more detailed explanation.
Crocheting the Panel and Pockets Together
- Work 15sc along both the body panel and the pocket.
- Next, make 4 sc on the body panel alone.
- Continue with 15 sc along the body panel and the next pocket.
- Work 18 sc across the first row of the body panel and the pocket.
- Then, make 15 sc along the body panel and the pocket.
- Make 4 sc on the body panel alone.
- Repeat 15 sc along the body panel and the final pocket.
- Finish with 18 sc along the last row of the body panel and the first row of the pocket.
- Cut the yarn and weave in the ends.
- Technically, we will have 104 sc from crocheting the panel and pockets together, BUT, it’s okay if you miss one sc or two as long as the end result looks nice and clean!
Flap
- Go back to the first row of either pocket (your choice) where you previously crocheted 18 sc to join it with the body panel.
- Choose the middle 8sc out of 18. These 8 stitches will be the base for crocheting the flap directly.
- Watch this part of the tutorial for a more detailed explanation.
R1 Bring the yarn & Ch1, 1sc into each st [8]
R2-R7 Ch1, Turn, 8sc (6 rows) [8]
R8-R9 Ch1, Turn, 3sc, 2ch, skip 2sc, 3sc (2 rows) [6sc, 2ch]
R10 Ch1, Turn, 3sc, 2sc (on ch), 3sc [8]
R11-R12 Ch1, Turn, 8sc (2 rows) [8]
R13 Ch1, Turn, 1dec, 4sc, 1dec [6]
R14 Ch1, Turn, 1dec, 2sc, 1dec [4]
- Cut the yarn.
Now, we’ll crochet along the flap to make it look cleaner & nicer.
- Start at the bottom right side and bring the yarn to begin.
- Ch 1, work 14 sc along the first side, 4 sc across the last row of the strap, and 14 sc along the third (last) side.
- Here again, you should have a total of 32 sc, but it’s okay if there’s a difference of one or two stitches as long as it looks neat.
Keyring loop
Go back to the middle 2sc out of 4sc on the body panel between the two pockets.
R1 Bring the yarn, Ch1, 2sc [2]
R2-R7 Ch1, Turn, 2sc (6 rows) [2]
- Cut the yarn leaving a long tail
- Sew the final row along the bottom of the 1st row to form a loop.
Ribbon
- Start with a slip knot and make 60ch. Here, I would recommend to use a bigger hook (4mm) to make chains so that you can easily insert into the back bumps for the slip stitches!
- (I switched to 3mm hook), Make 1slst into each back bumps of the chains all the way until the end. [59 slst]
- Watch this part of the tutorial for a more detailed explanation.