Crochet Croissant Pouches
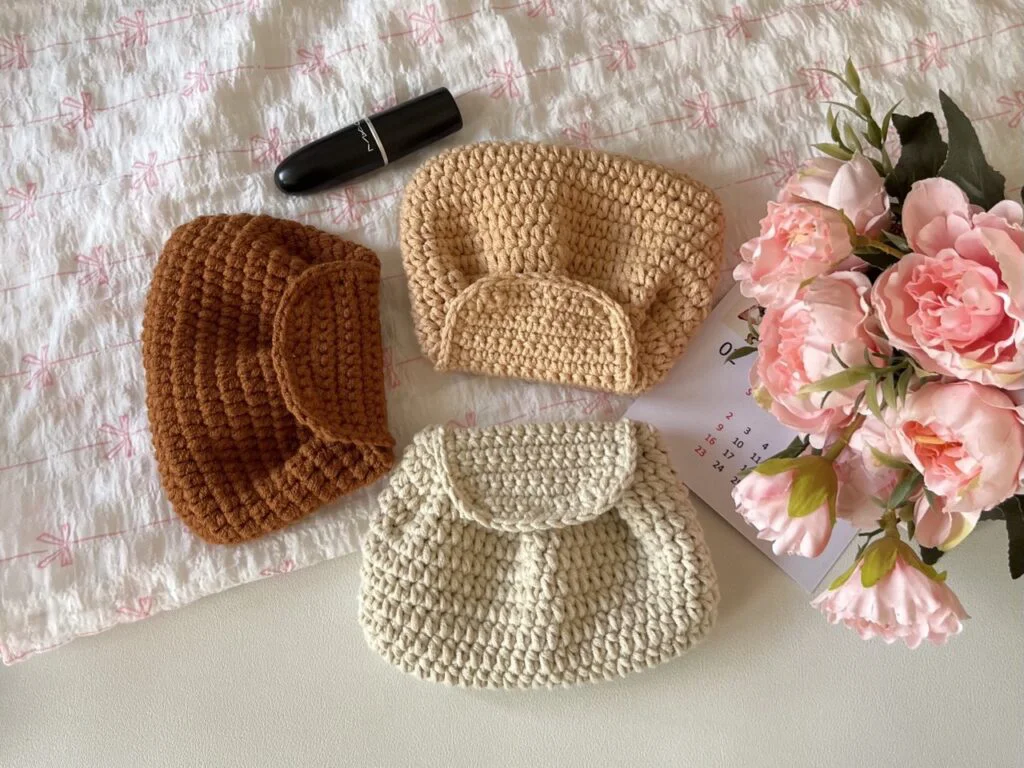
Welcome back to another delightful crochet project! Today, we have an absolutely adorable and incredibly delicious pattern for you: Crochet Croissant Pouches! If you love crafting cute foodie items and need the perfect tiny gift or market prep stash builder, this fun and fluffy amigurumi pouch pattern is going to be your next favorite make.
This pattern is wonderfully adaptable and absolutely perfect for using up your scrap yarn. While the instructions are tailored for their tiny, classic pouch size, you can easily adjust the size variations depending on the yarn used—swap out fine cotton for super bulky blanket yarn to create a massive, huggable croissant pillow! Grab your hooks, settle into your favorite crafting spot, and let’s dive into making these adorable little pastry pouches!
Materials Needed
- Cotton(5ply) , Acrylic, or Sport in Light Brown (or any color of your preference)
- 3mm crochet hook
- button or snap buttons
- stitch markers, darning needle, pins and scissors
Crochet Abbreviations
- R – round/row
- Ch – chain
- st – stitch
- sc – single crochet
- inc – increase
- dec – decrease
- hdc – half double crochet
- slst – slip stitch
- *- repeat
- [] – total stitch count in each round/row
Do not miss out any details! Open this video as you crochet along to make the process more effective and time-saving.
Body
Start with a slip knot and make 25ch.
R1 Starting from the 3rd ch from the hook, 1hdc inc, 21hdc, 4hdc (in the last ch), 21hdc, 1hdc inc, 1slst (into the 1st hdc) [50]
R1 Ch1, 1hdc, 1hdc inc, 21hdc, (1hdc, 1hdc inc) *2, 22hdc, 1hdc inc, 1slst [54]
R3-R10 Ch1, 54hdc, 1slst (8 rounds) [54]
- Watch how to make the folds in R11 in this part of the tutorial!
R11 Ch1, 5sc, (skip 2sc, 2sc together, skip 4sc, 3sc,) *3, 16sc, 1slst [36]
- Cut the yarn and weave in the ends.
Flap
- Starting from the second last sc of R11 of the body, crochet from right to left!
R1 Ch1, 13sc [13]
R2-R5 Ch1 & Turn, 13sc (4 rows) [13]
R6 Ch1 & Turn, 1dec, 9sc, 1dec [11]
R7 Ch1 & Turn, 1dec, 7sc, 1dec [9]
Edging: 7sc on the 1st side, 9sc on the 2nd side or R7, 7sc on the 3rd side [23]
- Sew the snap buttons on the body and on inner side of the flap.
Alternative way to make R7 to leave buttonhole
R7 Ch1 & Turn, 1dec, 2sc, skip 3 sc, 4ch (here, adjust the buttonhole depending on the size of your button), 2sc, 1dec
Edging: 7sc on the 1st side, (3sc, 1sc on each ch, 3sc) on the 2nd side or R7, 7sc on the 3rd side
- Sew the button on the body of the pouch.
- Watch this part of the tutorial to see how to crochet along the sides of the flap.
- Cut the yarn and weave in the ends.