Best Easy Cute Halloween Cats Amigurumi Free Crochet Pattern
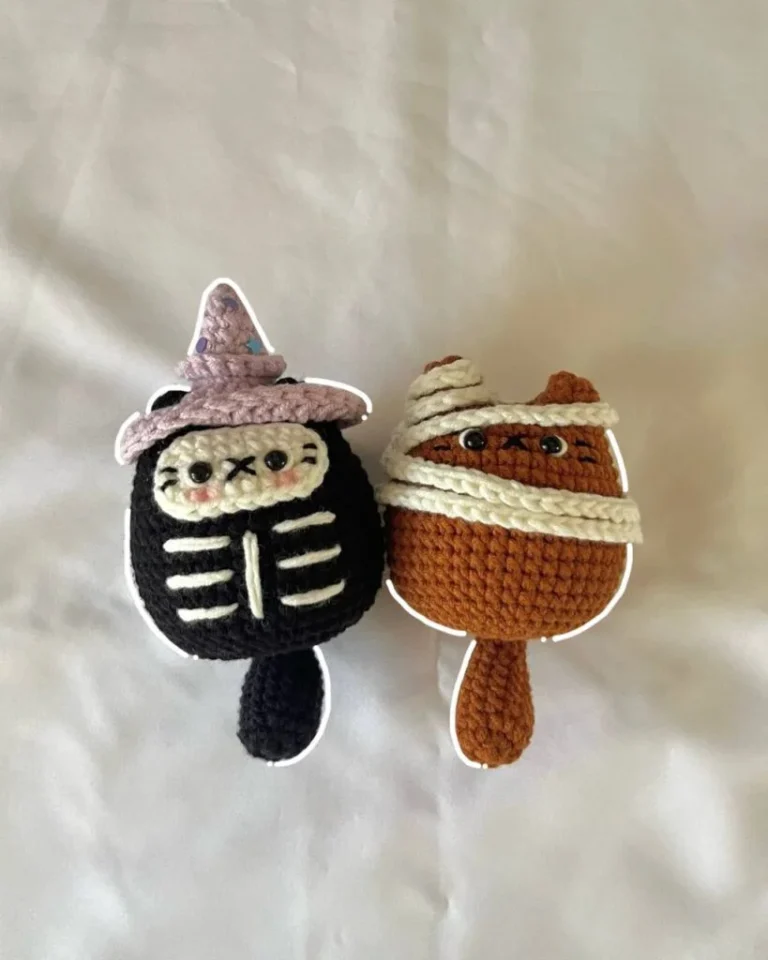
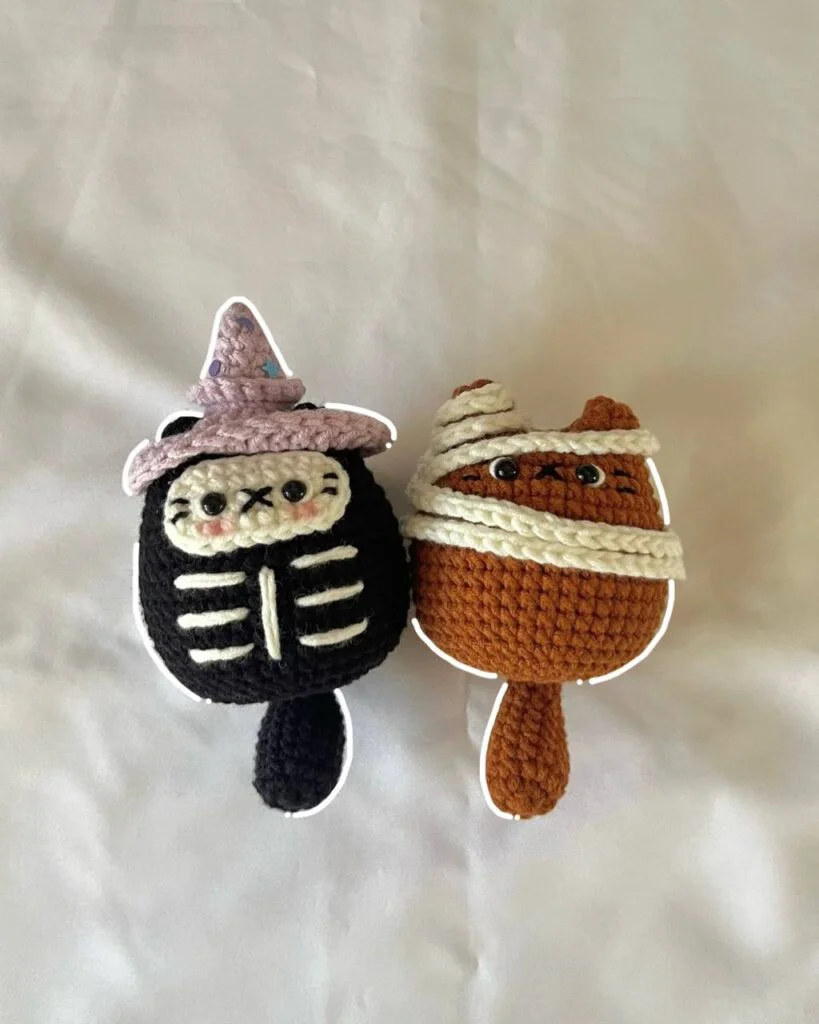
Are you looking for the absolute best free pattern for a cute halloween cats amigurumi? You have come to the perfect place! We have found this top-rated, incredibly easy crochet design that is guaranteed to be a huge hit. Whether you want a quick weekend project or a beautiful handmade gift, this pattern is fun, straightforward, and looks absolutely stunning when finished. Grab your softest yarn and let’s get started on your new favorite project!
Materials Needed
- Acrylic / Cotton or Sport yarn (5ply) in Brown, Purple, Black, and White
- 3mm crochet hook
- Stitch marker and Pins
- Glue
- Darning Needle and Scissors
Crochet Abbreviations
Abbreviations are in US terminology.
- Ch – Chain
- st – stitch
- R – round / row
- sc – single crochet
- inc – increase
- dec – decrease
- hdc – half double crochet
- dc – double crochet
- slst – slip stitch
- BLO – back loop only
- FLO – front loop only
- * – repeat
- [] – total stitch count in each round
Do not miss out any details! Open this video as you crochet along to make the process more effective and timesaving.
Ears
Use Brown yarn and Start with a magic ring.
R1 5sc in mr [5]
R2 5inc [10]
- Make 2 ears. Cut the yarn after making the first ear. DO NOT cut the yarn after making the second ear.
Connecting the ears and Continuing the body.
- Make 4ch and connect to the last stitch of the first ear by making 1sc, which will be the first sc of our new round.
- Watch this part of the tutorial to see how to connect the two ears.
R3 10sc (on the first ear), 4sc (on the upper loops of Ch4), 10sc (on the second ear), 4sc (on the lower loops of Ch4) [28]
R4-R5 1sc in each stitch (2 rounds) [28]
R6 (3sc, 1inc)*7 [35]
R7 1sc in each stitch [35]
R8 (2sc, 1inc, 2sc)*7 [42]
R9-R18 1sc in each stitch (10 rounds) [42]
R19 (1sc, 1dec)*14 [28]
Start stuffing and continue stuffing after each following rounds!
R20 14dec [14]
R21 7dec [7]
- Cut the yarn and close the body.
- Watch this part of the tutorial to see how to close the amigurumi hole.
We’ll continue making the face.
- Glue the eyes on the R7 with 4sc apart between them.
- Using the darning needle, embroider the white yarn around the half of the eyes for a cuter look.
- Separate the black yarn into two strands and embroider an x shape in the middle two stitches between the eyes.
- Embroider the two whiskers beside each eye, one stitch apart from each other.
- Watch this part of the tutorial to see the details about making the face.
Tail
Start with a magic ring.
R1 6sc in mr [6]
R2 6inc [12]
R3-R7 1sc in each stitch (5 rounds) [12]
R8 (2sc, 1dec)*3 [9]
R9-R10 1sc in each stitch (2 rounds) [9]
R11 2sc, 1dec, 3sc, 1dec [7]
R12-R16 1sc in each stitch (5 rounds) [7]
- Close the tail with 3sc by crocheting the opposite sc together.
- Cut the yarn, leaving a long tail.
- Using the darning needle, sew the tail on R14 or R15 on the back of the body.
- Watch this part of the tutorial to see how to close and sew the tail.
Bandages
Use White yarn and Start with a slip knot.
Long Bandage: Ch120, 1slst into each ch (starting from the 2nd ch from the hook) [119]
- Cut the yarn, leaving a long tail.
- Wrap the bandage around the head and the body and sew it using the darning needle (You can also glue it if you prefer).
- Watch this part of the tutorial to see how to wrap and sew the bandage.
Short Bandage: Ch25, 1slst into each ch (starting from the 2nd ch from the hook) [24]
- Cut the yarn, leaving a long tail.
- Wrap the bandage around the left ear and sew it using the darning needle. (You can also glue it if you prefer).
Face Patch for the Black Cat
Use White yarn and Start with a slip knot.
Make 8ch.
R1 Starting from the 2nd ch from the hook, 1inc, 5sc, (4sc in 1 st), 5sc, 1inc, 1slst (into the first sc) [18]
R2 Ch1, 1sc, 1inc, 5sc, 1inc, 2sc, 1inc, 5sc, 1inc, 1sc [22]
- Cut the yarn, leaving a long tail.
- Watch this part of the tutorial to see how to make the face patch.
- Using the darning needle, insert the needle into the first stitch of R2, come back to the final stitch, and insert into BLO and the loop underneath.
- Weave the end into the wrong side of the face patch.
- Watch this part of the tutorial to see how to weave in the ends.
- Make the face in the same way as you would do onto the body of the other cats.
- Glue the face patch to the body, right below the ears.
Hat
Use purple yarn and start with a magic ring.
R1 6sc into mr [6]
R2 (1sc, 1inc)*3 [9]
R3 1sc in each stitch [9]
R4 (2sc, 1inc)*3 [12]
R5 1sc in each stitch [12]
R6 (3sc, 1inc)*3 [15]
R7 In BLO, 1sc in each stitch [15]
R8 In FLO, 3dc inc, 6ch, skip 3sc, 3dc inc, 6ch, skip 3sc, 3dc inc [30]
R9 12dc, (in FLO, 6dc), 12dc, 1slst (into the next st) [30]
- Ch1, cut the yarn, and weave in the ends.
- Insert the hook into the FLO of the 1st stitch in R7 and bring the purple yarn.
In FLO, make 1sc into each stitch, 1slst (into the first sc) [15]
- Cut the yarn and weave in the ends.
- Watch this part of the tutorial to see a more detailed explanation.