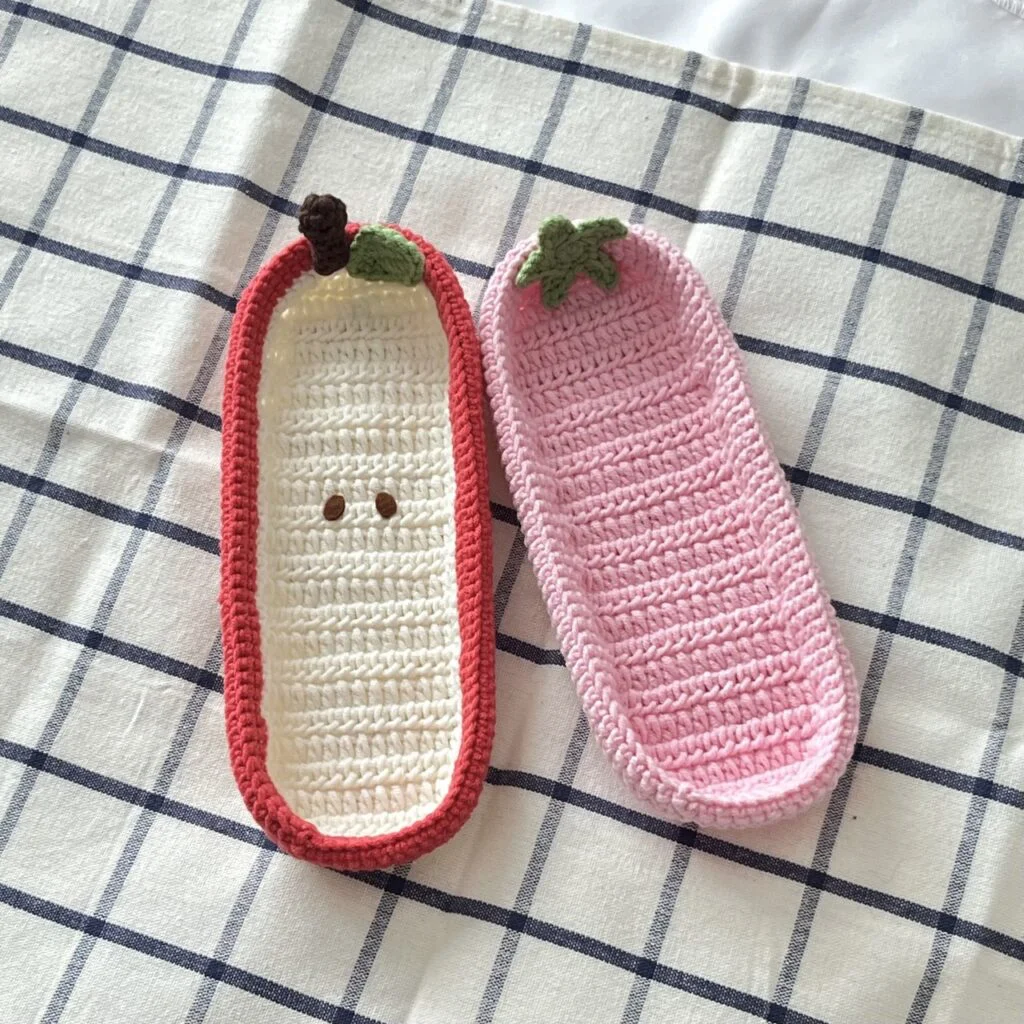
Best Free Guide: How To Crochet Adorable And Useful Crochet Trays (Easy Breakdown)
Are you looking for the absolute best free guide on how to crochet adorable and useful crochet trays? You have come to the perfect place! We have put together this top-rated, incredibly easy breakdown that is guaranteed to help you. Whether you are a total beginner or just looking for a quick refresher, this guide is fun, straightforward, and incredibly useful. Grab your hook and let’s get started on your new favorite crochet journey!
Materials Needed
- Cotton or Acrylic yarn (sports weight, 5ply) in any color you prefer.
- 3mm crochet hook
- Stitch markers, darning needle and scissors
- Brown felt cloth (optional)
Crochet Abbreviations
The abbreviations are in US terminology!
- R – round/row
- Ch – chain
- st – stitch
- sc – single crochet
- inc – increase
- dec – decrease
- dc – double crochet
- hdc – half double crochet
- slst – slip stitch
- *- repeat
- [] – total stitch count in each round/row
- sk – skip
Base
Note: this is a longer base for Strawberry and Apple trays.
Start with 12ch.
R1 Starting from second chain from the hook, 10hdc [10]
R2 Ch2 & turn, 1hdc inc, 8hdc, 1hdc inc [12]
R3 Ch2 & turn, 1hdc inc, 10hdc, 1hdc inc [14]
R4-R21 Ch2 & turn, 14hdc (18 rows) [14]
R22 Ch2 & turn, 1dec, 10hdc, 1dec [12]
R23 Ch2 & turn, 1dec, 8hdc, 1dec [10]
After R23, continue crochet along the edges with sc, 2sc into the edge of each row in vertical side and 1sc into each st in horizontal sides.
Watch this part of the tutorial for a more detailed explanation.
1st side: 46sc
2nd side: Crocheting into lower loop of each ch, 10sc
3rd side: 46sc
4th side: Crocheting along R23 of the base, 10sc
There will be a total of 112 sts and this will make up Round1 again. Small difference in total st count here can be negligible as long as the bordering looks clean and neat.
R1 Bordering along the edge [112sc]
R2-R3 Ch1, 112sc, 1slst (2 rounds) [112]
R4 Ch1, FLO 112sc, 1slst [112]
R5-R6 Ch1, 112sc, 1slst (2 rounds) [112]
- Cut the yarn and weave in the ends.
Shorter Base (for Tomato tray)
Start with 12ch.
R1 starting from second chain from the hook, 10hdc [10]
R2 Ch2 & turn, 1hdc inc, 8hdc, 1hdc inc [12]
R3 Ch2 & turn, 1hdc inc, 10hdc, 1hdc inc [14]
R4-R12 Ch2 & turn, 14hdc (9 rows) [14]
R13 Ch2 & turn, 1dec, 10hdc, 1dec [12]
R14 Ch2 & turn, 1dec, 8hdc, 1dec [10]
- Continuing bordering and working up a total of 6 more rounds, applying the similar technique as the longer trays.
Star leaf (for tomato & strawberry trays)
Start with a magic ring.
R1 8sc in mr, 1slst
R2 (Ch4, 1slst, 1sc, 1hdc, sk next st on R1, 1slst into anther)*5
- Cut the yarn.
Apple leaf
Start with 8ch.
R1 Starting from second chain from the hook, 2sc, 1hdc, 2dc, 1hdc,( 4sc) into last ch, 1hdc, 2dc, 1hdc, 2sc, 1slst into first sc
- Cut the yarn.
Apple Stem
Start with a magic ring
R1 8sc in mr [8]
R2-R3 8sc (2 rounds) [8]
R4 (2sc, 1dec)*2 [6]
R5-R6 6sc (2 rounds) [6]
- Close the round with 2sc, by crocheting opposite stitches together, and cut the yarn.
- Watch this part of the tutorial for a more detailed explanation.
Assembly
You can either sew or glue the leaves onto the top of the tray. For the Apple Tray, I recommend sewing the stem in place. Cut two small oval shapes from brown felt and glue it to the center of the Apple tray to create a more adorable and realistic look.
Watch this part of the tutorial for a more detailed explanation.