Crochet Poncho Top – Pretty Simple
Welcome back to another delightful crochet project! Today, we have an absolutely stunning and wonderfully effortless pattern for you: the Pretty Simple Crochet Poncho Top! If you love crafting stylish, comfortable garments that are perfect for throwing over a tank top or dress, this gorgeous and totally unique poncho is going to be your next favorite make.
This pattern is wonderfully adaptable and perfect for updating your summer and transition wardrobe, allowing you to whip up beautiful and breezy clothing in record time. While the instructions are tailored for their classic, relaxed fit, you can easily adjust the color variations depending on the yarn used—swap out neutral cottons for vibrant, bold threads to make a cozy fashion statement! Grab your hooks, settle into your favorite crafting spot, and let’s dive into making this beautiful poncho top creation!
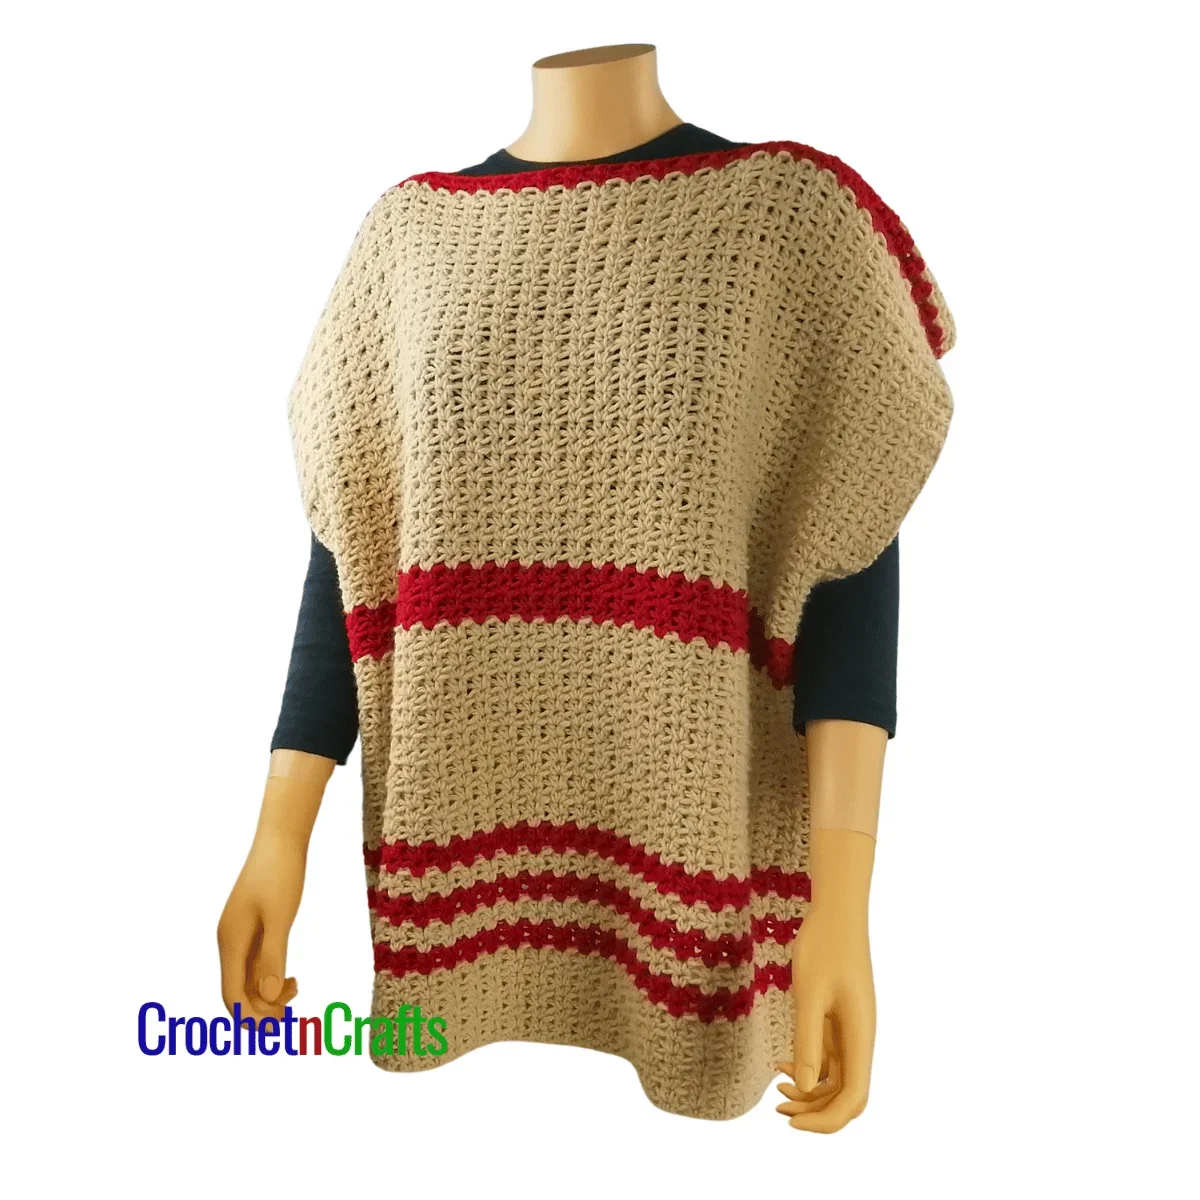
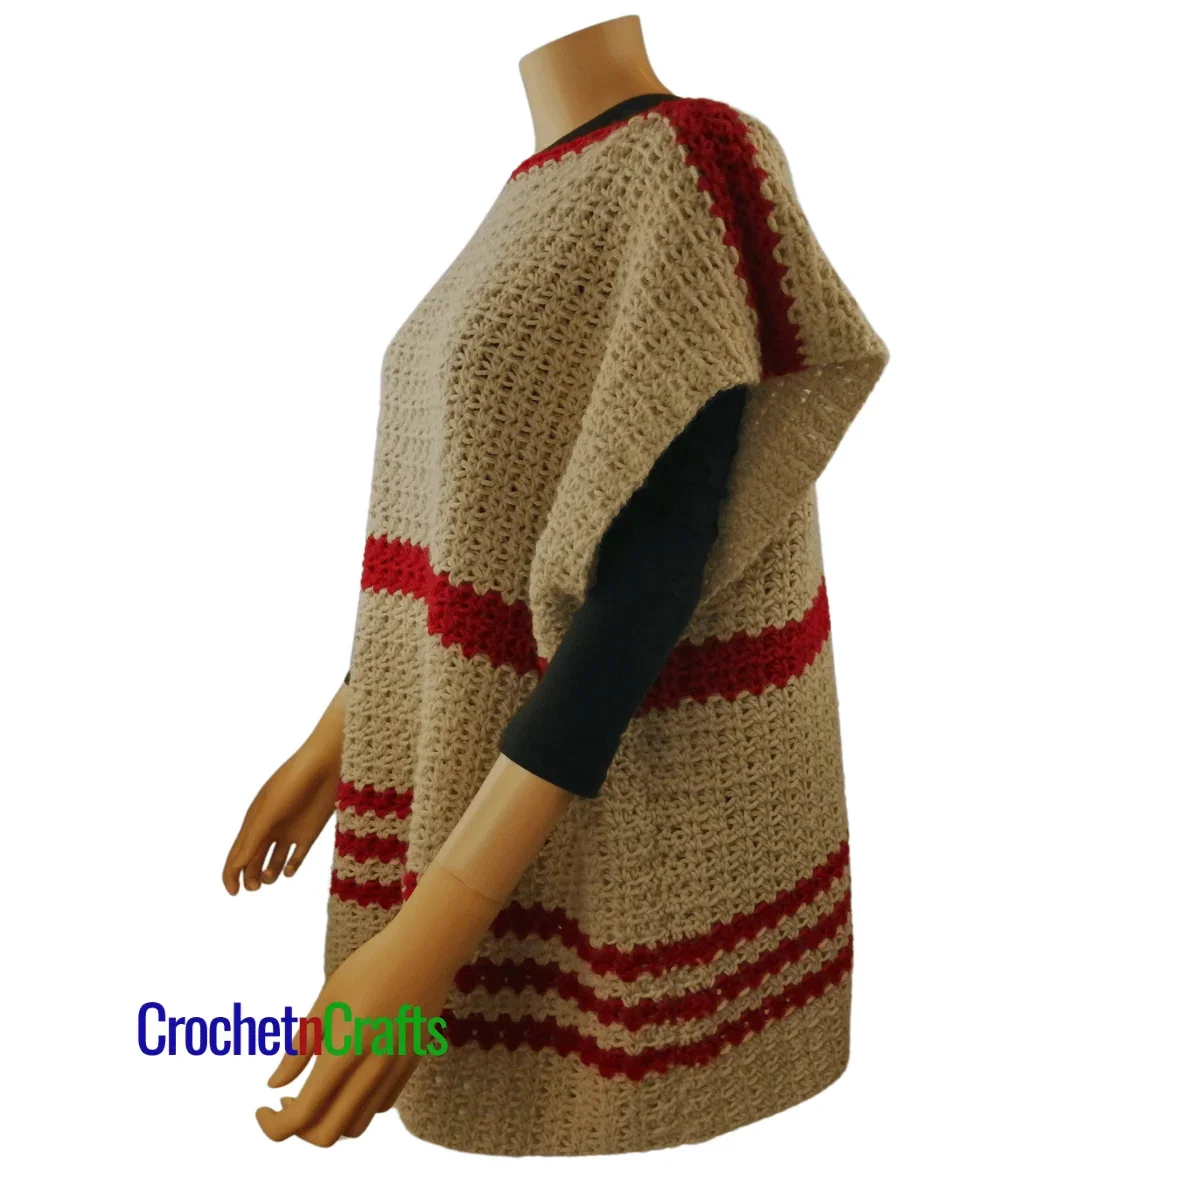
Skill Level: Easy
Materials
- Yarn: Lion Brand Yarns – Pound Of Love (Medium, #4; 100% Premium Acrylic; 1020yds/932m; 16oz./454g) Colors: (CA) = Sugar Cookie – 1 (1, 1, 2, 2) ball/balls; (CB) = Cherry – 1 (1, 1, 1, 1) ball.
- Crochet Hook: J-10/6mm
- Other: Measuring Tape, Scissors, Yarn Needle, Stitch Markers, Area or Mat for Blocking, Pins for Blocking.
Sizes/Measurements
- Gauge: 11 sts = 4″
- Finished Sizes: XS, (S, M, L, XL)
- To Fit Bust Sizes: 28, (32, 36, 40, 44″)
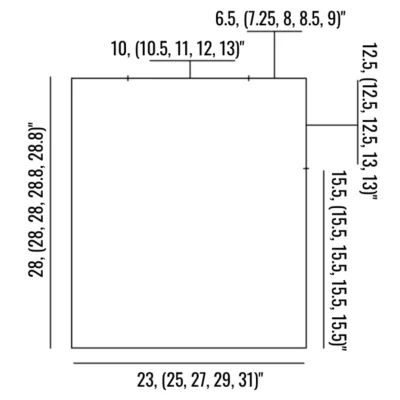
- Finished Width Measurements: 23, (25, 27, 29, 31)”
- Finished Length Measurements: 28, (28, 28, 28.8, 28.8)”
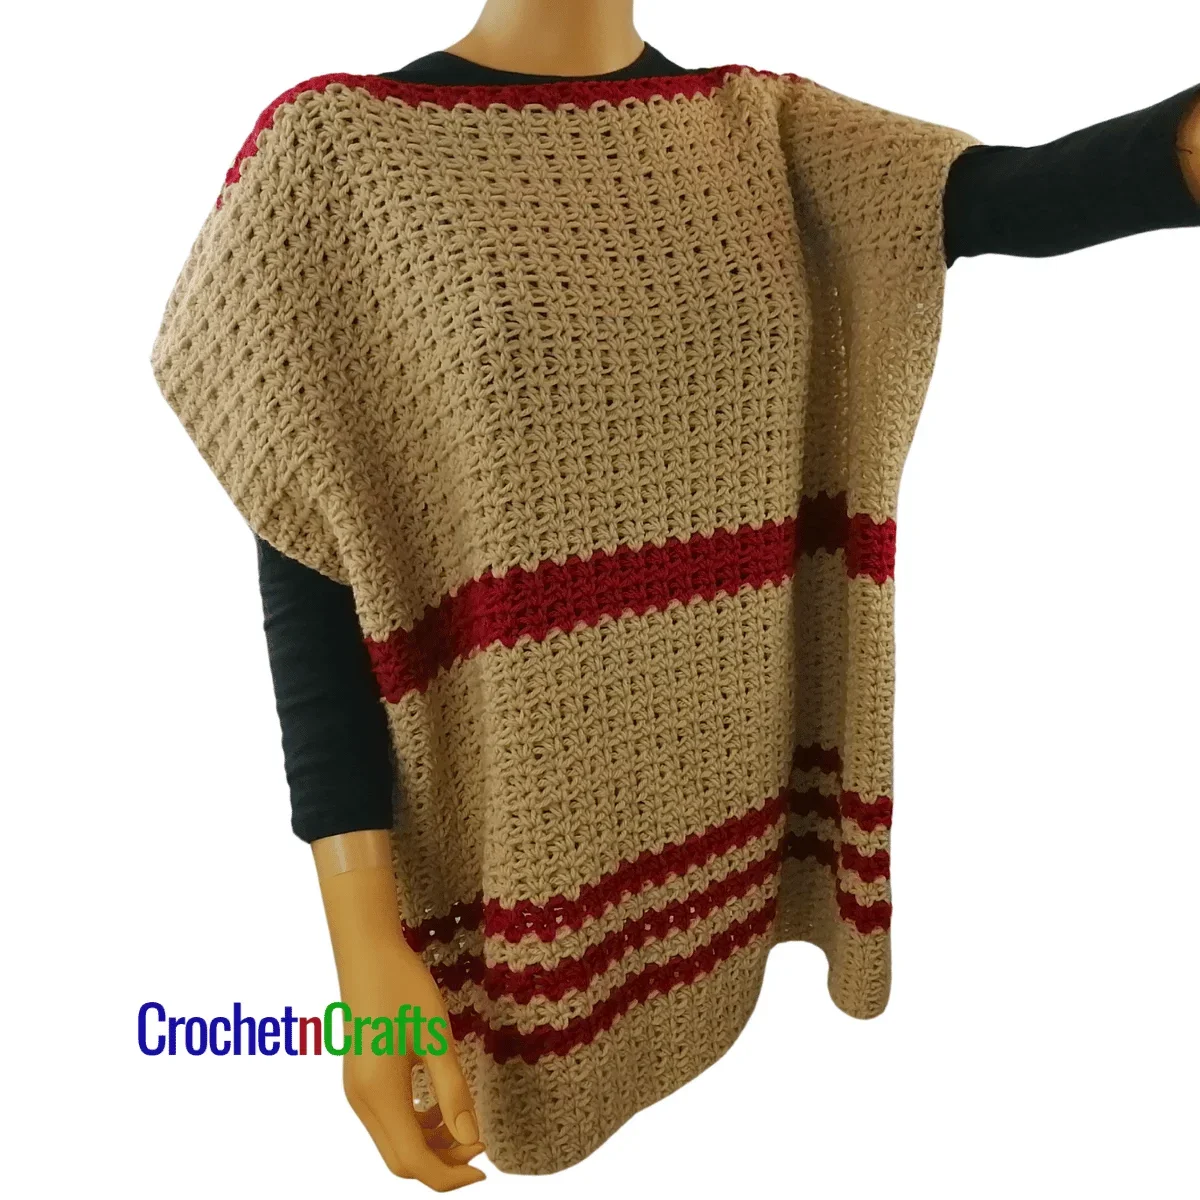
The medium is shown on a small mannequin.
Abbreviations
CA = Color A
CB = Color B
Ch/Chs = Chain/Chains
FO = Fasten Off
Hdc = Half Double Crochet
Rep = Repeat
RS = Right Side
Sk = Skip
St/Sts = Stitch/Stitches
V-St = V Stitch
WS = Wrong Side
Special Stitch Instructions
V-Stitch (v-st): 2 hdc in same stitch or space. When you work a v-st into another v-st, work the v-st in between the 2 hdc that make up the v-st.
To Change Colors
Work the last stitch in the previous row as normal until the last step and you have three loops left on the hook; drop the old color, pick up the new color, and draw through all loops to complete the stitch.
Drop the old color and carry it up at each row, or carry it up.
Notes
- The medium size is shown on a 33″ bust – perfect as an oversized top.
- The pattern is given for XS. Changes for sizes S, M, L, XL are given in parentheses.
- This garment is designed with 18″ of ease.
- Garment is worked in two pieces from bottom up; front and back. Each piece is worked identically.
- Block both pieces to dimensions before seaming.
- Gauge and measurements are given after blocking.
- Garment may stretch out lengthwise when worn. Mine stretched out for about an inch while hanging on the mannequin for a few days.
Customize
- Increase/Decrease the width as desired in any multiple of 2 + 1 for the starting chains. As for length, do more or less repeats of Row 2.
- Adjust shoulder and side seams for a custom fit for the neck and shoulders.
- Sew seams with the mattress stitch.
- Or, for a different look, leave the side seams open and simply crochet along the side and bottom edges with single crochet stitches.
Color Sequence
Rows 1-8: CA
Row 9-10: CB
Rows 11-12: CA
Rows 13-14: CB
Rows 15-16: CA
Rows 17-18: CB
Rows 19-34: CA
Rows 35-38: CB
Rows 39-68, (68, 68, 70, 70): CA
Last 2 Rows: CB.
Crochet Poncho Top Pattern Instructions
With CA and leaving a 40″ tail, ch 65, (71, 75, 81, 85) or any multiple of 2 + 1 to obtain the width you need.
Row 1 (WS): Hdc in 2nd ch from hk, hdc in next ch, *sk next ch, v-st in next ch; rep from * across to last 2 chs; hdc in last 2 chs. Turn. [4 hdc and 30, (33, 35, 38, 40) v-sts]
Row 2 (RS): Ch 1, hdc in first 2 hdc, v-st in next v-st and into each v-st across; hdc in last 2 hdc. Turn. [4 hdc and 30, (33, 35, 38, 40) v-sts]
Rows 3-70, (70, 70, 72, 72): Rep Row 2 changing colors as per color sequence.
Blocking
Block both pieces to measurements in the schematic. To block, simply wet the pieces and lay them flat to dry.
Shoulder Seams
Sew shoulder seams 6.5, (7.25, 8, 8.5, 9)” on each side leaving a 10, 10.5, 11, 12, 13″ opening for the neck.
Side Seams
Starting at the bottom with the tail end, sew seams along the sides for about 15.5″, leaving a 12.5, (12.5, 12.5, 13, 13)” opening for the armhole.
Edging for Armhole Openings
With a standing single crochet, join yarn to the bottom of the armhole seam and single crochet evenly around; join with a slip stitch in the first single crochet. FO.
You can also add the edging around the neck opening and the bottom if you like.
Schematic