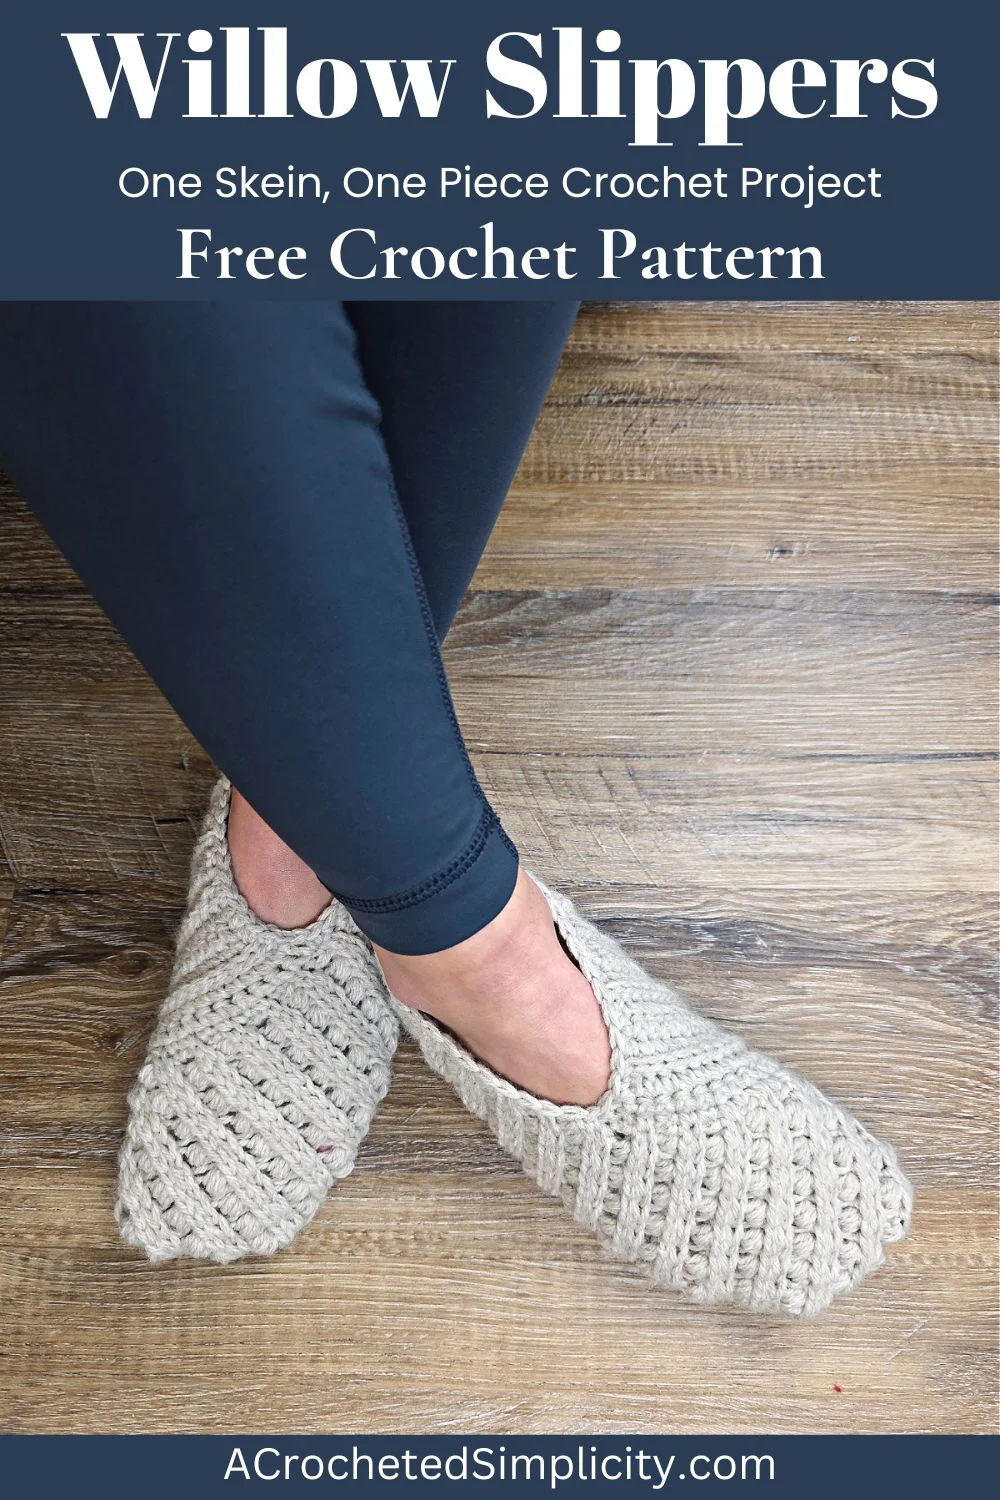
Willow Crochet Slippers
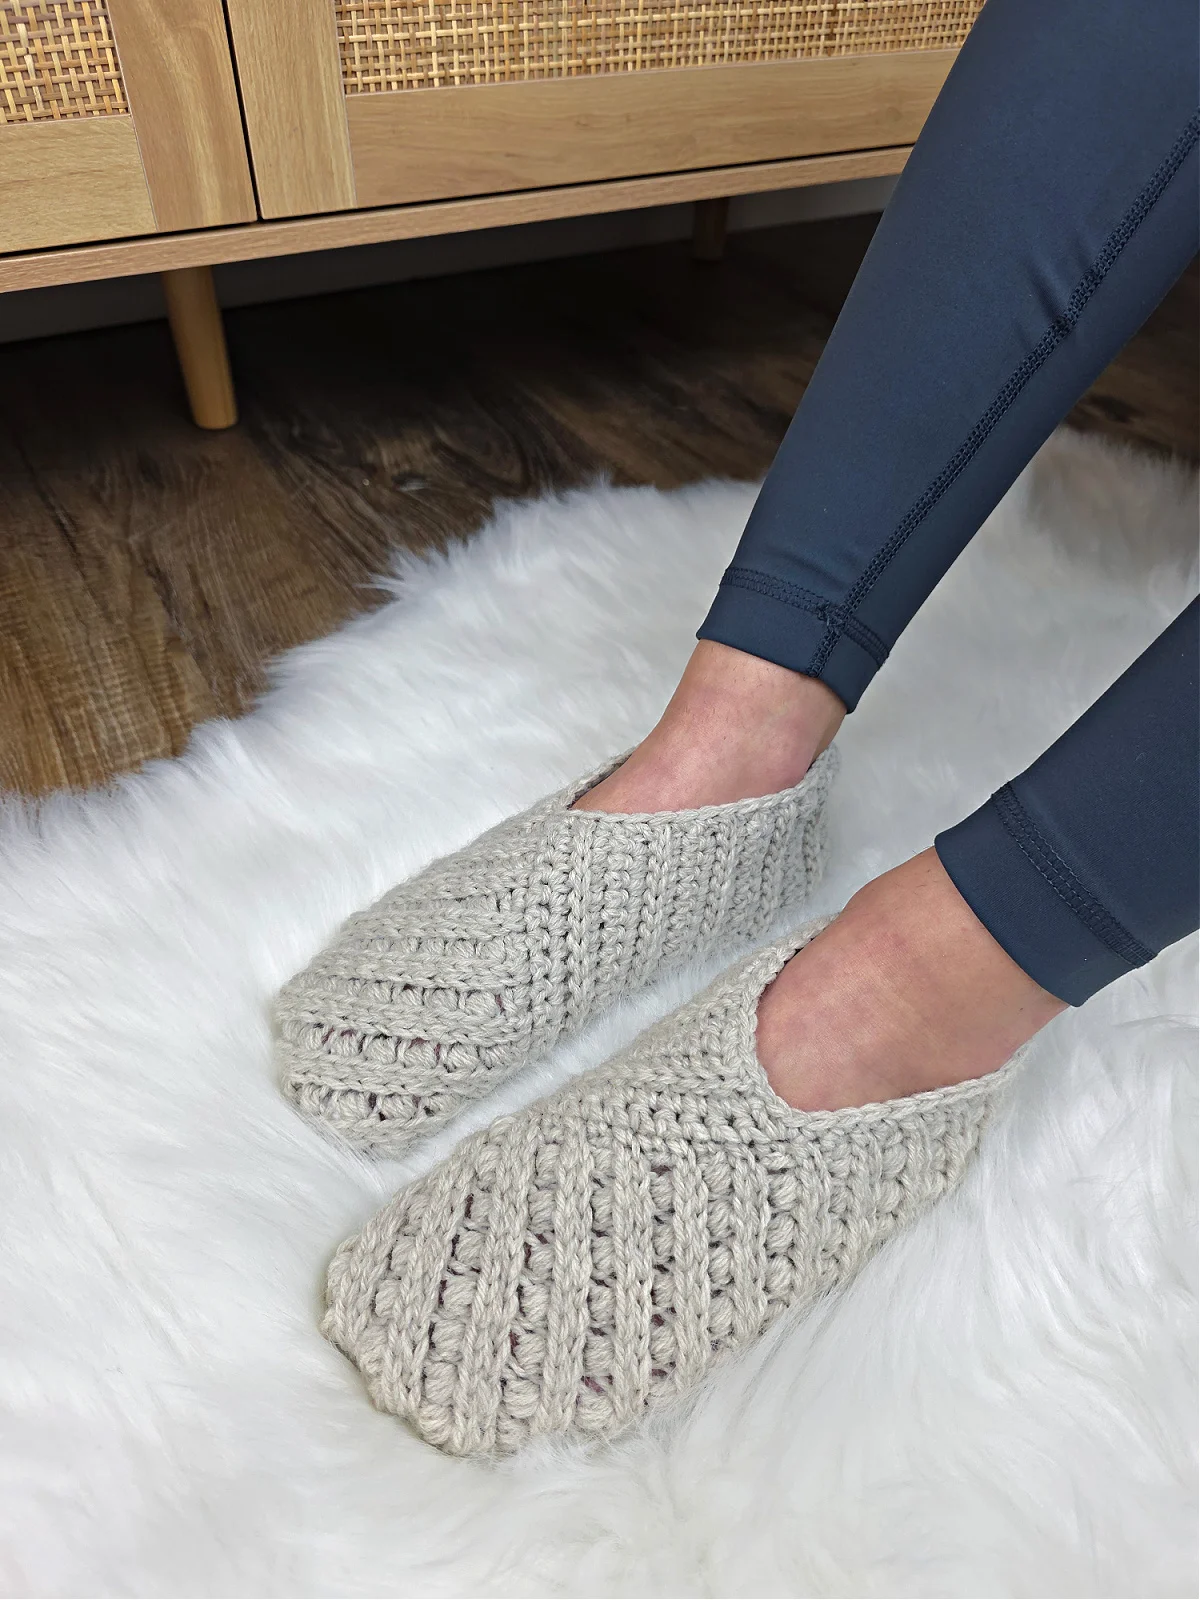
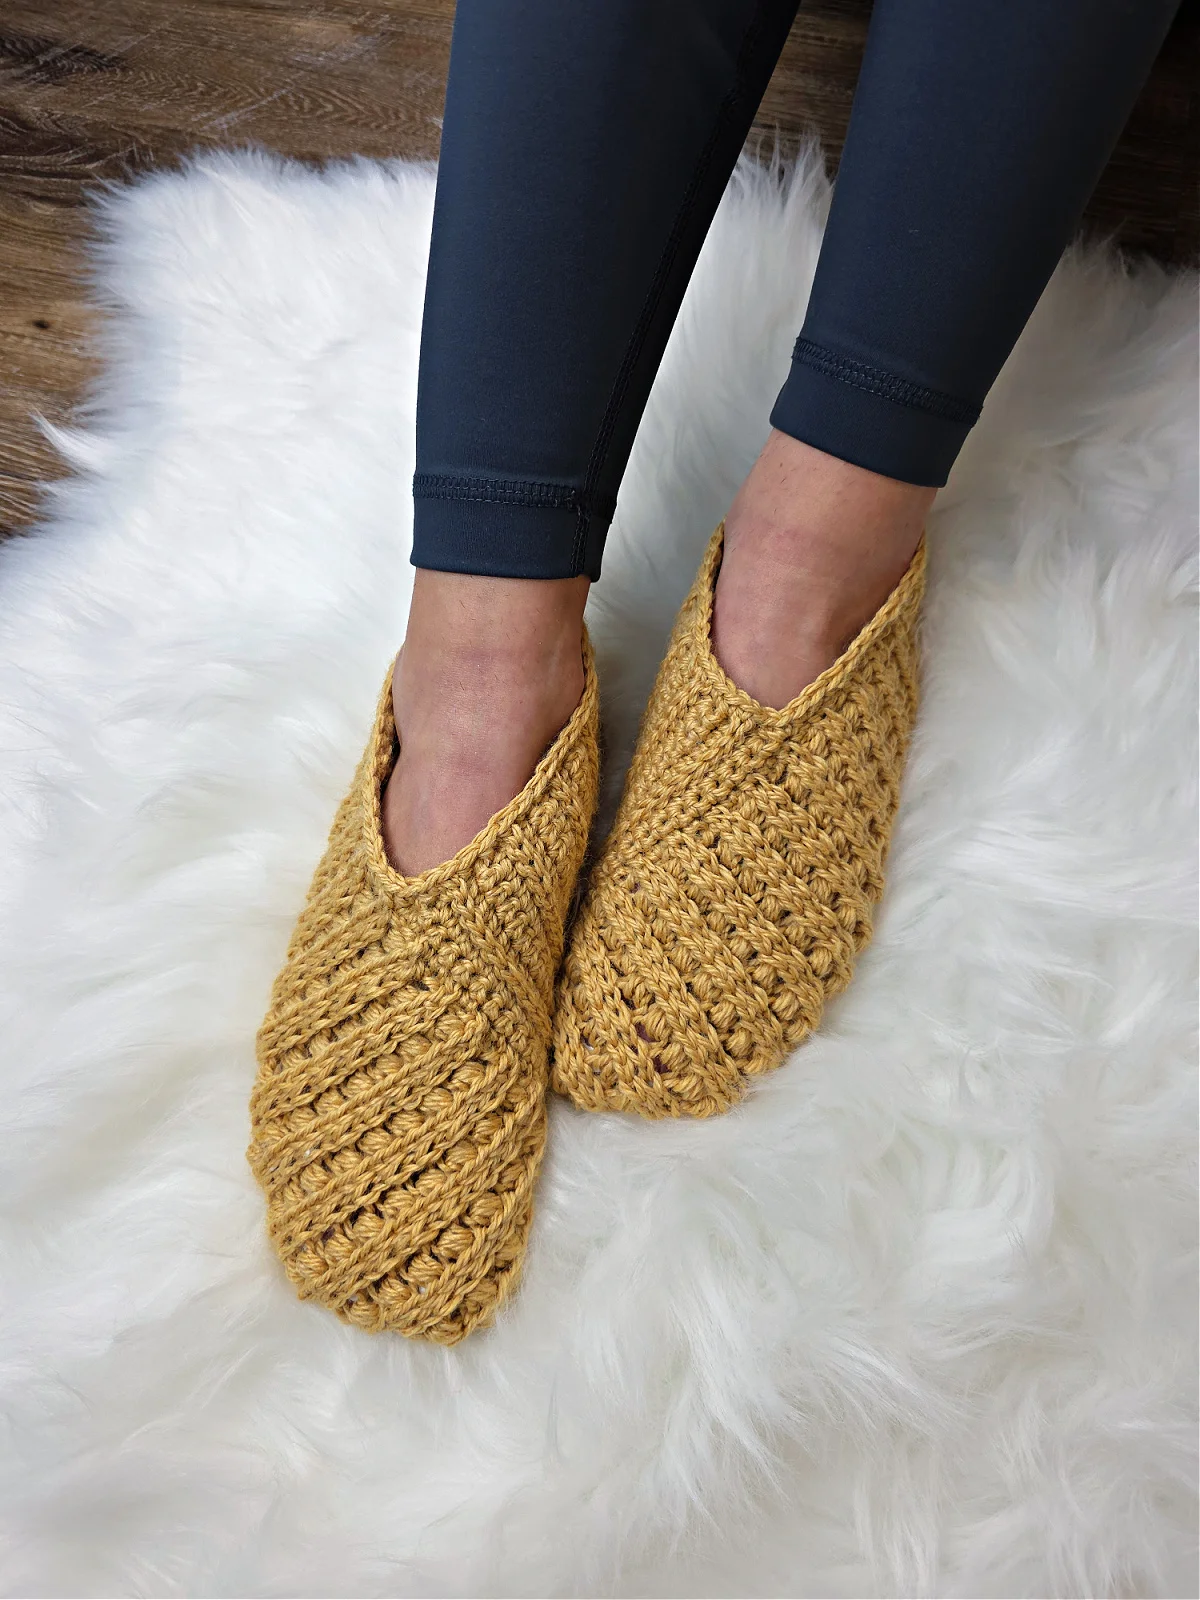
Welcome back to another delightful crochet project! Today, we have an absolutely cozy and wonderfully comforting pattern for you: the Willow Crochet Slippers! If you love crafting warm, snuggly footwear that perfectly blends relaxing textures with ultimate comfort for those chilly evenings at home, these beautifully structured and totally unique house slippers are going to be your next favorite make.
This pattern is wonderfully adaptable and perfect for quick handmade gifts or luxurious self-care projects, allowing you to whip up beautiful and practical loungewear in record time. While the instructions are tailored for their classic, plush fit, you can easily adjust the color variations depending on the worsted weight yarn used—swap out calming neutrals for rich jewel tones or bright pops of color to match any relaxing aesthetic! Grab your hooks, settle into your favorite crafting spot, and let’s dive into making these beautiful cozy slipper creations!
Materials
- Yarn: Worsted Weight / 4 / Yarn, Lion Brand Yarns Wool Ease Worsted and Lion Brand Yarns Re-Spun was used for the slippers shown in the photos.
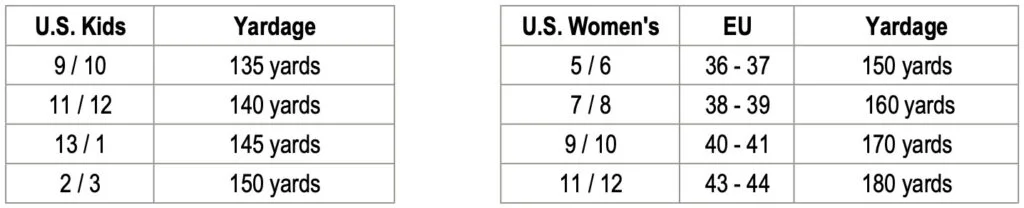
- Yardage: See Size Chart Above
- Crochet Hooks: H/8/5.00mm; G/6/4.00mm; or size needed to obtain gauge (My favorite crochet hooks are the Clover Amour Crochet Hooks, I’ve never had an ache in my hand since switching).
- Scissors
- Yarn Needle
- Measuring Tape
- Locking Stitch Markers
- Scrap piece of yarn
Abbreviations (US Terms)
- ch(s): chain(s)
- sl st(s): slip stitch(es)
- st(s): stitch(es)
- sp: space
- yo: yarn over
- sc: single crochet
- hdc: half double crochet
- ps: puff stitch
- Mslst2tog: modified slip stitch 2 together
- BLO: back loop only
- Rep: repeat
- Rnd: Round
- SM: stitch marker
- Join yarn with a standing single crochet
Special Stitches
- Modified Slip Stitch 2 Together (Mslst2tog): Insert hook into same st as last st worked, yo, pull up a loop, insert hook into next st, yo, pull up loop and pull thru both loops on hook. **This st is modified because you begin each one in the last stitch worked, therefore, your stitch count will not decrease. **Note: It will seem as though you’re working these stitches along the backside of the previous row. Video Tutorial can be viewed here.
- Puff Stitch (ps): Insert hook into stitch indicated, yo, pull up a loop, (yo, insert hook in same st, yo, pull up a loop) twice, yo, pull thru all 6 loops on hook.
- Join yarn with a standing single crochet: Begin with a slip knot on your hook, insert your hook into the stitch or space indicated, yo, pull up a loop, yo and draw thru both loops on hook.
Experience Level
- Easy / Intermediate
Gauge
- Gauge checks are given throughout the pattern.
Sizes
- Kid’s Sizes (US): 9/10, 11/12, 13/1, 2/3
- Women’s Sizes (US): 5/6, 7/8, 9/10, 11/12
- See Size & Yardage Chart above.
Pattern Notes
- Turning chains are not included in stitch count.
- Yarn Notes: Lion Brand Yarns Wool Ease Worsted and Lion Brand Yarns Re-Spun were used for the sample shown in the photos. Other comparable yarns may be used as long as gauge is met.
- Lion Brand Yarns Wool Ease: 80% Acrylic / 20% Wool (197 yds / 180 m / 85 g / 3 oz)
- Lion Brand Re-Spun: 100% Recycled Polyester (658 yds / 02 m / 284 g / 10 oz)
- Yardage & Color: See chart above
- Reinforcing the Slipper Sole: See tips above.
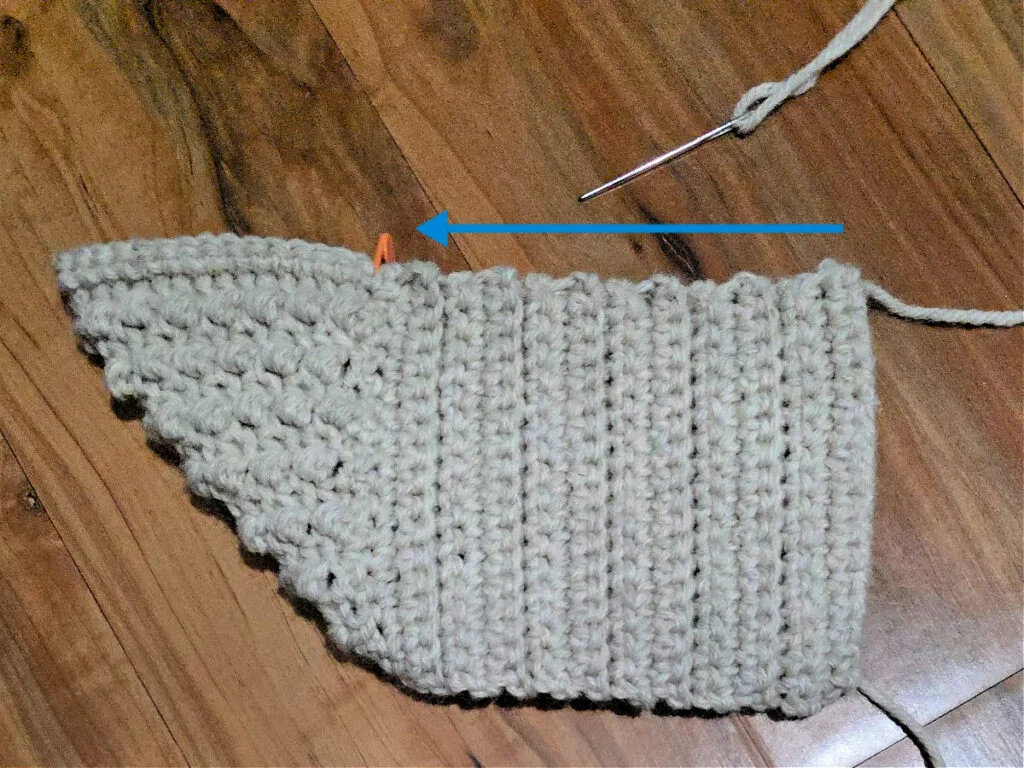
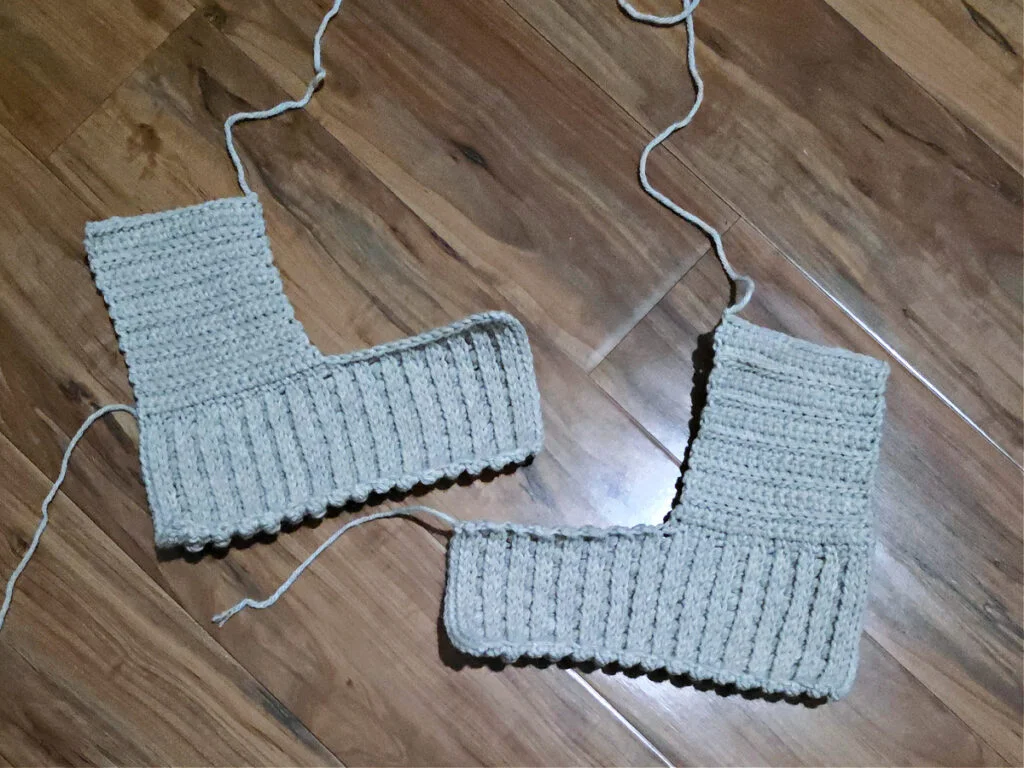
- Construction Notes: These crochet slippers are made in one piece. First, you’ll crochet a larger rectangle, then rotate the larger rectangle and work a smaller rectangle right onto a long edge. Then, fold the crochet fabric and seam the heel and bottom of the foot. Lastly, add a round of single crochet around the foot opening.
Willow Crochet Slippers – Written Pattern
Kids Slipper Instructions – Section 1
Note: The biggest piece of advice I can give you, that will make this pattern much more enjoyable, is to make sure you work your slip stitches loosely. If you do not, working the next row will be much harder than it needs to be.
Changes for Kids Sizes as follows: 9/10 (11/12, 13/1, 2/3)
Changes for Stitch Counts as follows: (9/10, 11/12, 13/1, 2/3)
Row 1 (RS): With yarn & a 5.00mm crochet hook, ch 15 (15, 17, 19), switch to a 4.00mm crochet hook, working into the back humps of the foundation ch, sc into the 2nd ch from your hook and in each ch across. Turn. (14, 14, 16, 18 sts)
Gauge Width Check: Row 1 should be approximately 3″ (3″, 3-1/2″, 4″) W at this point.
Row 2: Ch 1, sl st in the first st, then work 13 (13, 15, 17) Mslst2tog. Turn. (14, 14, 16, 18 sts)
Row 3: Ch 1, BLO hdc in the first st, (ch 1, skip the next st, BLO ps in the next st) rep from ( to ) across to the last st, BLO hdc in last st. Turn. (14, 14, 16, 18 sts)
Row 4: Rep Row 2.
Gauge Height Check: Your work should be approximately 1-1/4″ H at this point.
Row 5: Ch 1, BLO hdc in the first st, (BLO ps in the next st, ch 1, skip the next st) rep from ( to ) across to the last st, BLO hdc in last st. Turn. (14, 14, 16, 18 sts)
Row 6: Rep Row 2.
Do not fasten off. Continue on to the instructions for the size slippers you’re making.
Size Kids 9/10
Rows 7 – 26: Rep Rows 3 – 6. (14 sts)
Row 27: Ch 1, BLO sc in each st across. (14 sts)
Do not fasten off. Continue on to Section 2. Section 1 should measure approximately 3″ W x 7″ L.
Size Kids 11/12
Rows 7 – 26: Rep Rows 3 – 6. (14 sts)
Rows 27 – 28: Rep Rows 3 – 4. (14 sts)
Row 29: Ch 1, BLO sc in each st across. (14 sts)
Do not fasten off. Continue on to Section 2. Section 1 should measure approximately 3″ W x 7-1/2″ L.
Size Kids 13/1
Rows 7 – 30: Rep Rows 3 – 6. (16 sts)
Row 31: Ch 1, BLO sc in each st across. (16 sts)
Do not fasten off. Continue on to Section 2. Section 1 should measure approximately 3-1/2″ W x 8″ L.
Size Kids 2/3
Rows 7 – 30: Rep Rows 3 – 6. (18 sts)
Rows 31 – 32: Rep Rows 3 – 4. (18 sts)
Row 33: Ch 1, BLO sc in each st across. (18 sts)
Do not fasten off. Continue on to Section 2. Section 1 should measure approximately 4″ W x 8-1/2″ L.
Slipper Instructions – Section 2
Note: You’ll begin this section by working Row 1 along the long edge of Section 1. For the Right foot, you’ll only work halfway across the long edge. For the Left Foot, you’ll work across the entire long edge. You’ll then work all remaining rows the same for both feet.
Right Foot
Row 1 (RS): Rotate to work along the long edge, ch 1, sc in the first 14 (15, 16, 17) sts. Turn. (14, 15, 16, 17 sts)
Row 2: Ch 1, sc in each st across. Turn. (14, 15, 16, 17 sts)
Do not fasten off. Continue on to Row 3.
Left Foot
Row 1 (RS): Rotate to work along the long edge, ch 1, sc in each st across. Turn. (27, 29, 31, 33 sts)
Row 2: Ch 1, sc in each of the first 14 (15, 16, 17) sts. Turn. (14, 15, 16, 17 sts)
Do not fasten off. Continue on to Row 3.
Row 3 (RS): Ch 1, sc in each st across. Turn. (14, 15, 16, 17 sts)
Row 4: Ch 1, BLO sl st in each st across. Turn. (14, 15, 16, 17 sts)
Row 5: Ch 1, BLO sc in each st across. Turn. (14, 15, 16, 17 sts)
Rows 6 – 7: Ch 1, sc in each st across. Turn. (14, 15, 16, 17 sts)
Do not fasten off. Continue on to Row 8 for the size and foot you’re making.
Size Kids 9/10
Right Foot
Rows 8 – 11: Rep Rows 4 – 7. (14 sts)
Fasten off, leaving a tail of yarn that is approximately 24″ L. Continue on to Seaming. Section 2 should measure approximately 3-3/4″ W x 2-1/4″ L.
Left Foot
Rows 8 – 11: Rep Rows 4 – 7. (14 sts)
Row 12: Rep Row 4. (14 sts)
Fasten off, leaving a tail of yarn that is approximately 24″ L. Continue on to Seaming. Section 2 should measure approximately 3-3/4″ W x 2-1/4″ L.
Size Kids 11/12
Right Foot
Rows 8 – 15: Rep Rows 4 – 7. (15 sts)
Fasten off, leaving a tail of yarn that is approximately 24″ L. Continue on to Seaming. Section 2 should measure approximately 4″ W x 3″ L.
Left Foot
Rows 8 – 15: Rep Rows 4 – 7. (15 sts)
Row 16: Rep Row 4. (15 sts)
Fasten off, leaving a tail of yarn that is approximately 24″ L. Continue on to Seaming. Section 2 should measure approximately 4″ W x 3″ L.
Size Kids 13/1
Right Foot
Rows 8 – 19: Rep Rows 4 – 7. (16 sts)
Fasten off, leaving a tail of yarn that is approximately 24″ L. Continue on to Seaming. Section 2 should measure approximately 4-1/4″ W x 3-3/4″ L.
Left Foot
Rows 8 – 19: Rep Rows 4 – 7. (16 sts)
Row 20: Rep Row 4. (16 sts)
Fasten off, leaving a tail of yarn that is approximately 24″ L. Continue on to Seaming. Section 2 should measure approximately 4-1/4″ W x 3-3/4″ L.
Size Kids 2/3
Right Foot
Rows 8 – 23: Rep Rows 4 – 7. (17 sts)
Fasten off, leaving a tail of yarn that is approximately 24″ L. Continue on to Seaming. Section 2 should measure approximately 4-1/4″ W x 4-1/2″ L.
Left Foot
Rows 8 – 23: Rep Rows 4 – 7. (17 sts)
Row 24: Rep Row 4. (17 sts)
Fasten off, leaving a tail of yarn that is approximately 24″ L. Continue on to Seaming. Section 2 should measure approximately 4-1/2″ W x 4-1/2″ L.
Women’s Slipper Instructions – Section 1
Note: The biggest piece of advice I can give you, that will make this pattern much more enjoyable, is to make sure you work your slip stitches loosely. If you do not, working the next row will be much harder than it needs to be.
Changes for Adult Sizes as follows: S (M, L, XL)
Changes for Stitch Counts as follows: (S, M, L, XL)
Row 1 (RS): With yarn & a 5.00mm crochet hook, ch 19 (21, 23, 25), switch to a 4.00mm crochet hook, working into the back humps of the foundation ch, sc into the 2nd ch from your hook and in each ch across. Turn. (18, 20, 22, 24 sts)
Gauge Width Check: Row 1 should be approximately 4″ (4-1/2″, 5″, 5-1/2″) W at this point.
Row 2: Ch 1, sl st in the first st, then work 17 (19, 21, 23) Mslst2tog. Turn. (18, 20, 22, 24 sts)
Row 3: Ch 1, BLO hdc in the first st, (ch 1, skip the next st, BLO ps in the next st) rep from ( to ) across to the last st, BLO hdc in last st. Turn. (18, 20, 22, 24 sts)
Row 4: Rep Row 2.
Gauge Height Check: Your work should be approximately 1-1/4″ H at this point.
Row 5: Ch 1, BLO hdc in the first st, (BLO ps in the next st, ch 1, skip the next st) rep from ( to ) across to the last st, BLO hdc in last st. Turn. (18, 20, 22, 24 sts)
Row 6: Rep Row 2.
Do not fasten off. Continue on to the instructions for the size slippers you’re making.
Size Small
Rows 7 – 30: Rep Rows 3 – 6. (18 sts)
Rows 31 – 32: Rep Rows 3 – 4. (18 sts)
Row 33: Ch 1, BLO sc in each st across. (18 sts)
Do not fasten off. Continue on to Section 2. Section 1 should measure approximately 4″ W x 8-1/2″ L.
Size Medium
Rows 7 – 34: Rep Rows 3 – 6. (20 sts)
Row 35: Ch 1, BLO sc in each st across. (20 sts)
Do not fasten off. Continue on to Section 2. Section 1 should measure approximately 4-1/2″ W x 9″ L.
Size Large
Rows 7 – 34: Rep Rows 3 – 6. (22 sts)
Rows 35 – 36: Rep Rows 3 – 4. (22 sts)
Row 37: Ch 1, BLO sc in each st across. (22 sts)
Do not fasten off. Continue on to Section 2. Section 1 should measure approximately 5″ W x 9-1/2″ L.
Size XL
Rows 7 – 38: Rep Rows 3 – 6. (24 sts)
Row 39: Ch 1, BLO sc in each st across. (24 sts)
Do not fasten off. Continue on to Section 2. Section 1 should measure approximately 5-1/2″ W x 10″ L.
Slipper Instructions – Section 2
Note: You’ll begin this section by working Row 1 along the long edge of Section 1. For the Right foot, you’ll only work halfway across the long edge. For the Left Foot, you’ll work across the entire long edge. You’ll then work all remaining rows the same for both feet.
Right Foot
Row 1 (RS): Rotate to work along the long edge, ch 1, sc in the first 17 (18, 19, 20) sts. Turn. (17, 18, 19, 20 sts)
Row 2: Ch 1, sc in each st across. Turn. (17, 18, 19, 20 sts)
Do not fasten off. Continue on to Row 3.
Left Foot
Row 1 (RS): Rotate to work along the long edge, ch 1, sc in each st across. Turn. (33, 35, 37, 39 sts)
Row 2: Ch 1, sc in each of the first 17 (18, 19, 20) sts. Turn. (17, 18, 19, 20 sts)
Do not fasten off. Continue on to Row 3.
Row 3 (RS): Ch 1, sc in each st across. Turn. (17, 18, 19, 20 sts)
Row 4: Ch 1, BLO sl st in each st across. Turn. (17, 18, 19, 20 sts)
Row 5: Ch 1, BLO sc in each st across. Turn. (17, 18, 19, 20 sts)
Rows 6 – 7: Ch 1, sc in each st across. Turn. (17, 18, 19, 20 sts)
Do not fasten off. Continue on to Row 8 for the size and foot you’re making.
Size Small
Right Foot
Rows 8 – 23: Rep Rows 4 – 7. (17 sts)
Fasten off, leaving a tail of yarn that is approximately 24″ L. Continue on to Seaming. Section 2 should measure approximately 4-1/4″ W x 4-1/2″ L.
Left Foot
Rows 8 – 23: Rep Rows 4 – 7. (17 sts)
Row 24: Rep Row 4. (17 sts)
Fasten off, leaving a tail of yarn that is approximately 24″ L. Continue on to Seaming. Section 2 should measure approximately 4-1/4″ W x 4-1/2″ L.
Size Medium
Right Foot
Rows 8 – 27: Rep Rows 4 – 7. (18 sts)
Fasten off, leaving a tail of yarn that is approximately 24″ L. Continue on to Seaming. Section 2 should measure approximately 4-1/2″ W x 5-1/4″ L.
Left Foot
Rows 8 – 27: Rep Rows 4 – 7. (18 sts)
Row 28: Rep Row 4. (18 sts)
Fasten off, leaving a tail of yarn that is approximately 24″ L. Continue on to Seaming. Section 2 should measure approximately 4-1/2″ W x 5-1/4″ L.
Size Large
Right Foot
Rows 8 – 31: Rep Rows 4 – 7. (19 sts)
Fasten off, leaving a tail of yarn that is approximately 24″ L. Continue on to Seaming. Section 2 should measure approximately 4-3/4″ W x 6″ L.
Left Foot
Rows 8 – 31: Rep Rows 4 – 7. (19 sts)
Row 32: Rep Row 4. (19 sts)
Fasten off, leaving a tail of yarn that is approximately 24″ L. Continue on to Seaming. Section 2 should measure approximately 4-3/4″ W x 6″ L.
Size XL
Right Foot
Rows 8 – 35: Rep Rows 4 – 7. (20 sts)
Fasten off, leaving a tail of yarn that is approximately 24″ L. Continue on to Seaming. Section 2 should measure approximately 5″ W x 6-3/4″ L.
Left Foot
Rows 8 – 35: Rep Rows 4 – 7. (20 sts)
Row 36: Rep Row 4. (20 sts)
Fasten off, leaving a tail of yarn that is approximately 24″ L. Continue on to Seaming. Section 2 should measure approximately 5″ W x 6-3/4″ L.
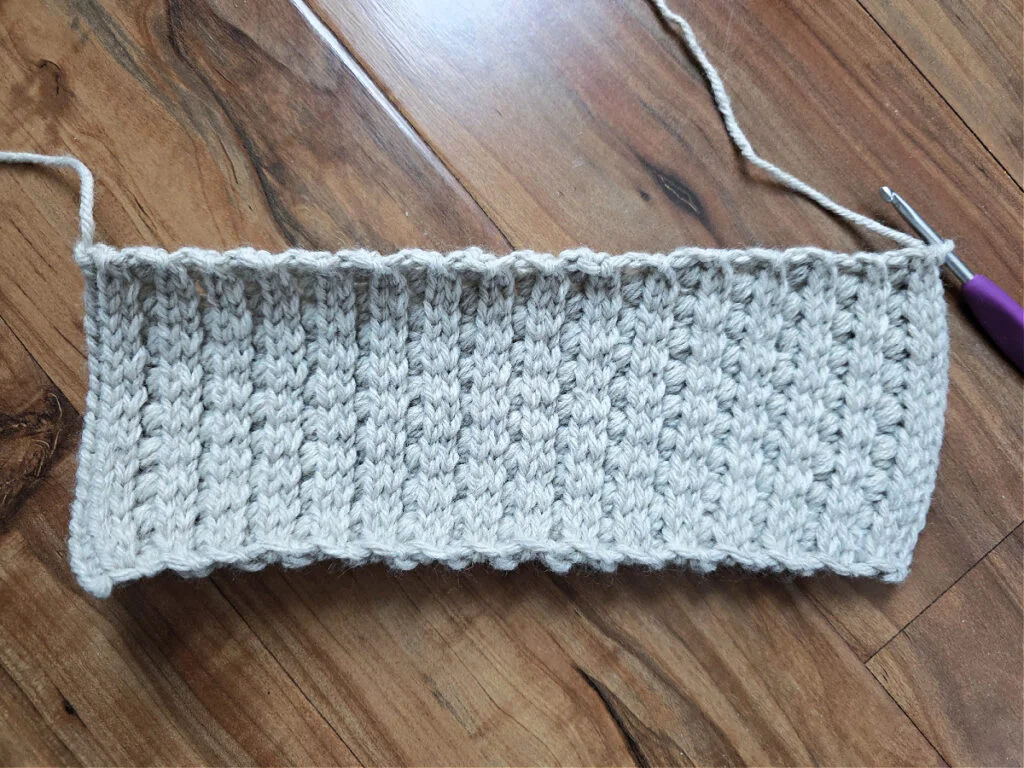
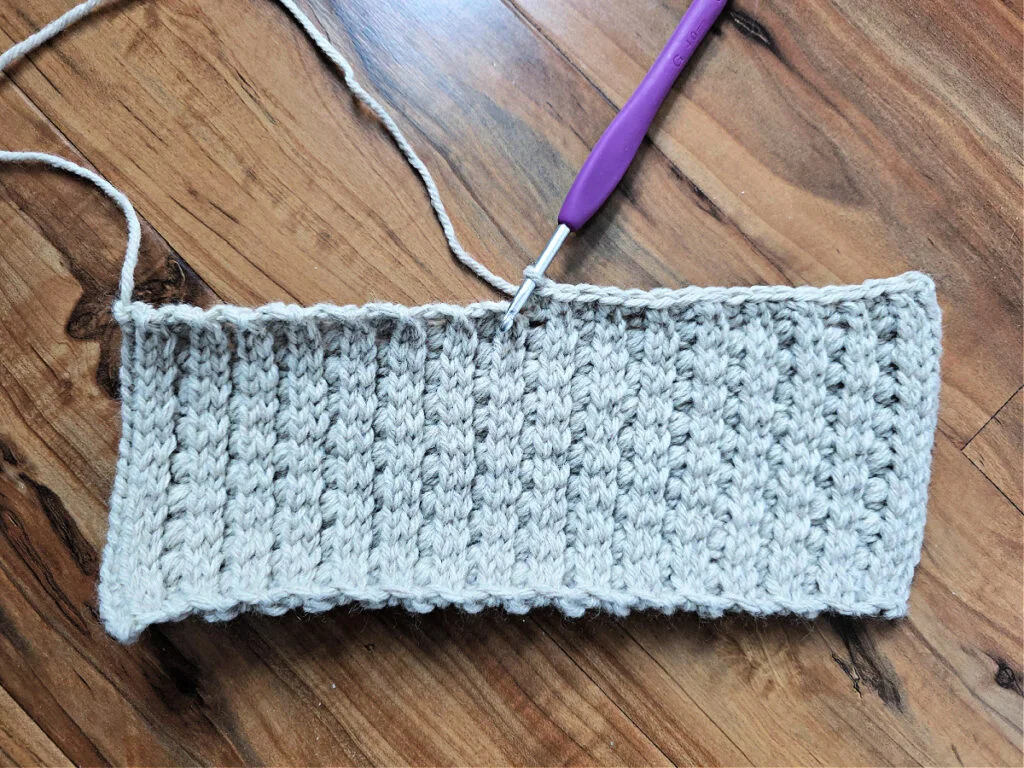
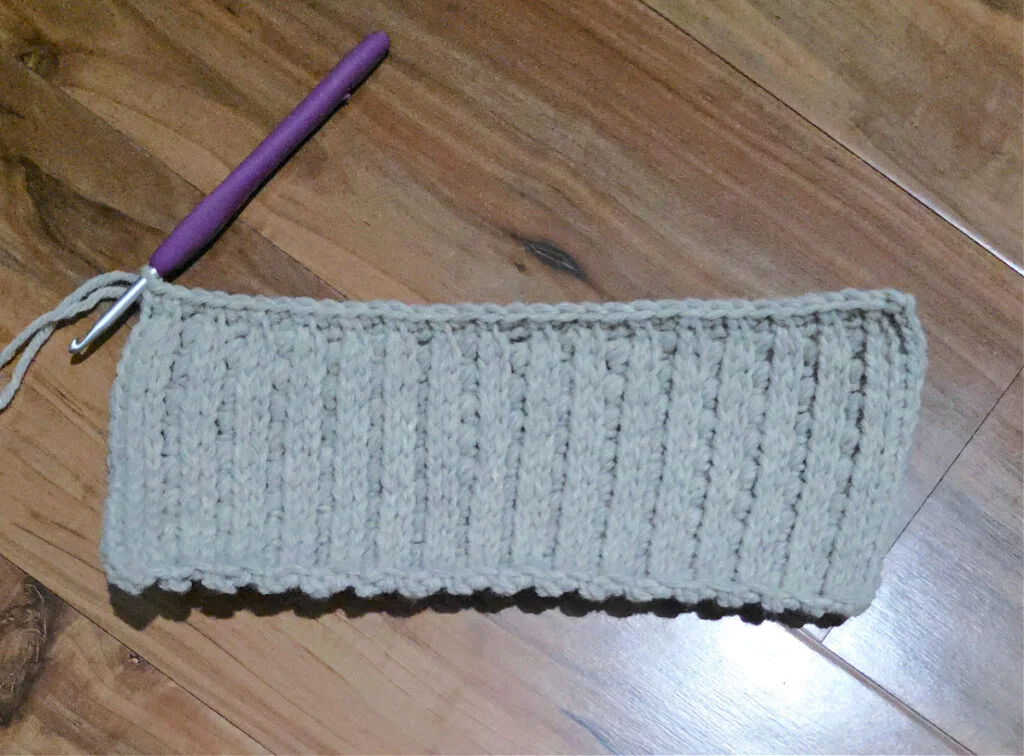
Progression Photos – All Sizes
The slippers shown in the photos are women’s size 7/8. The progression is the same for all sizes.
Seaming
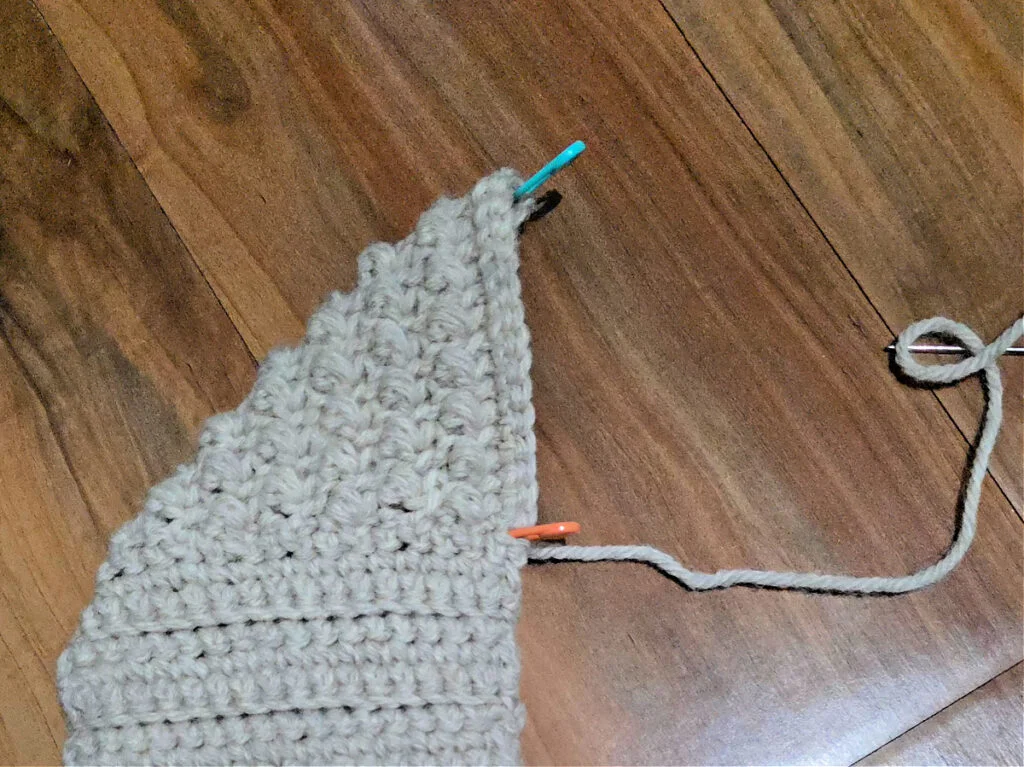
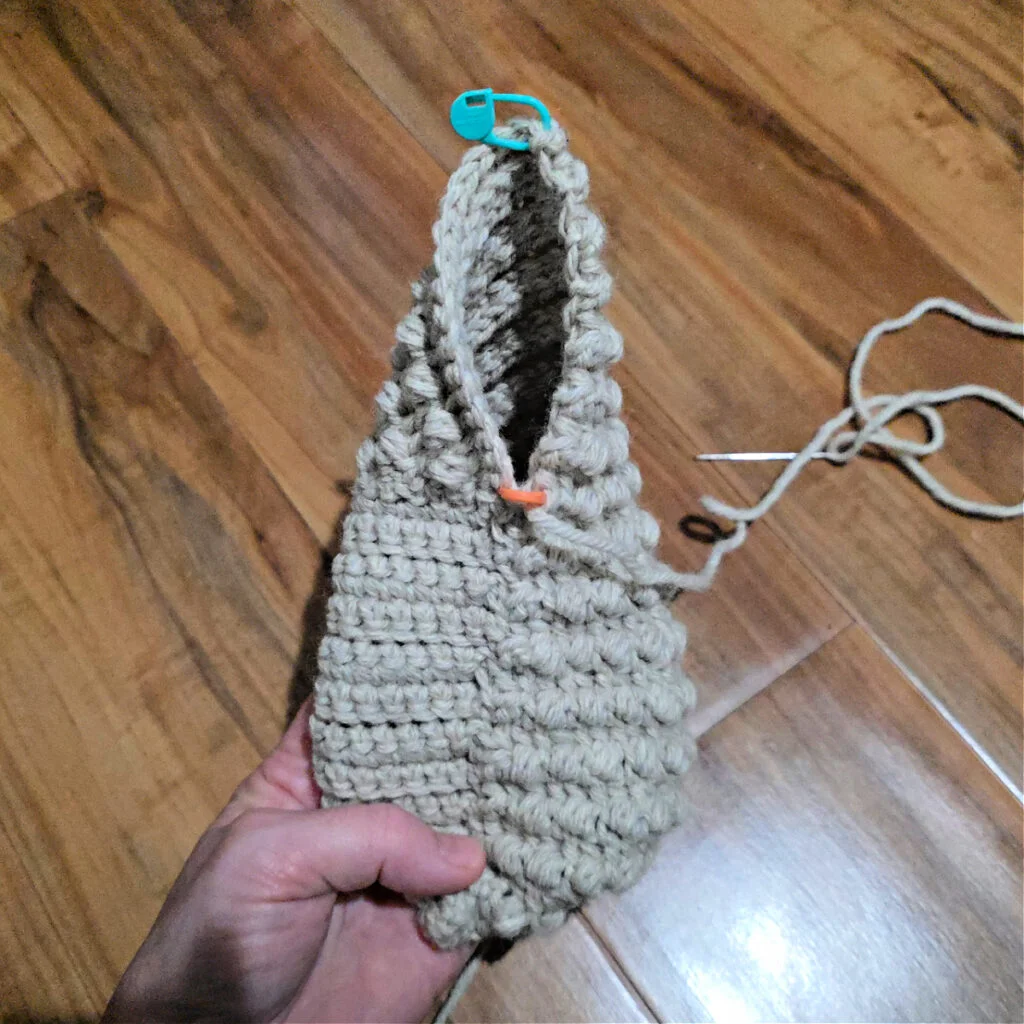
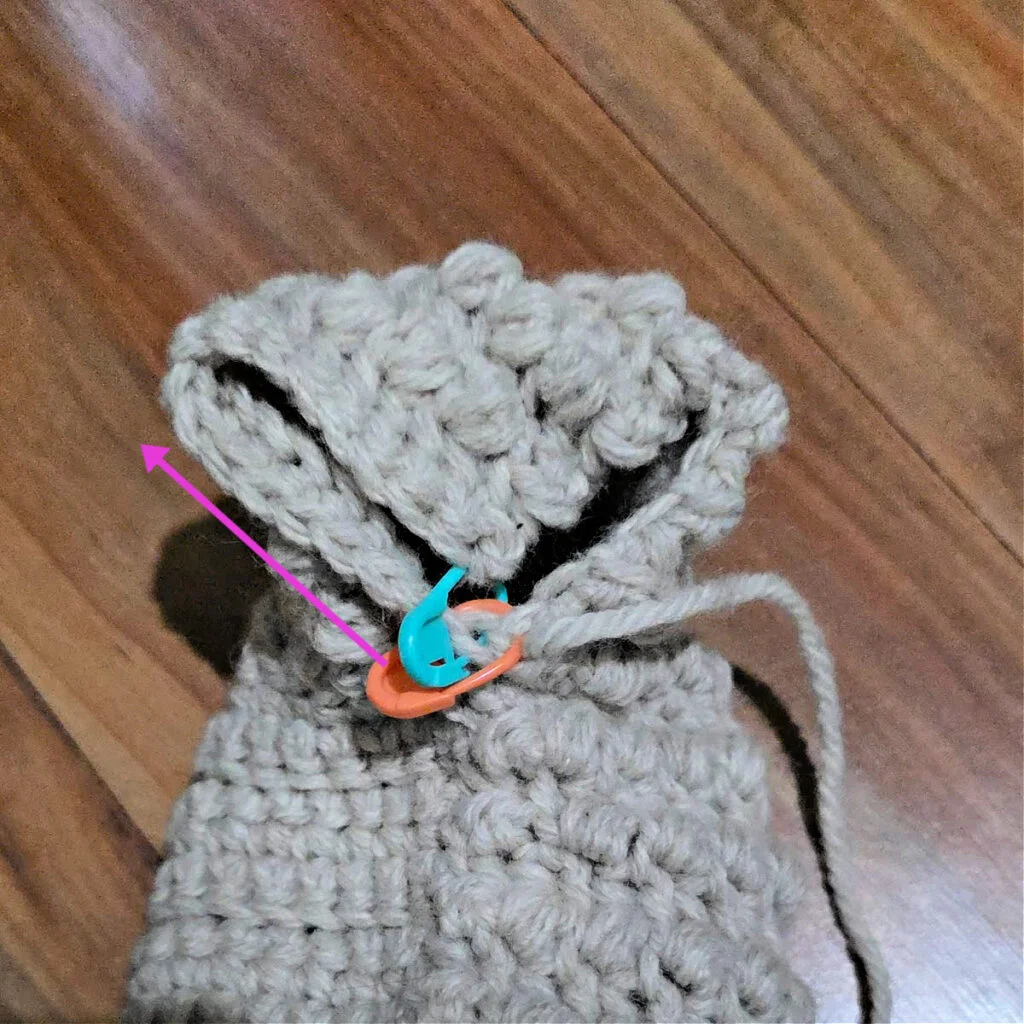
In this section, you’ll fold your work and seam the edges together to form the slipper. You’ll begin by seaming the heel, from top to bottom, then seam across the bottom of the foot to the toes. Lastly, you’ll seam two short seams at the toe section.
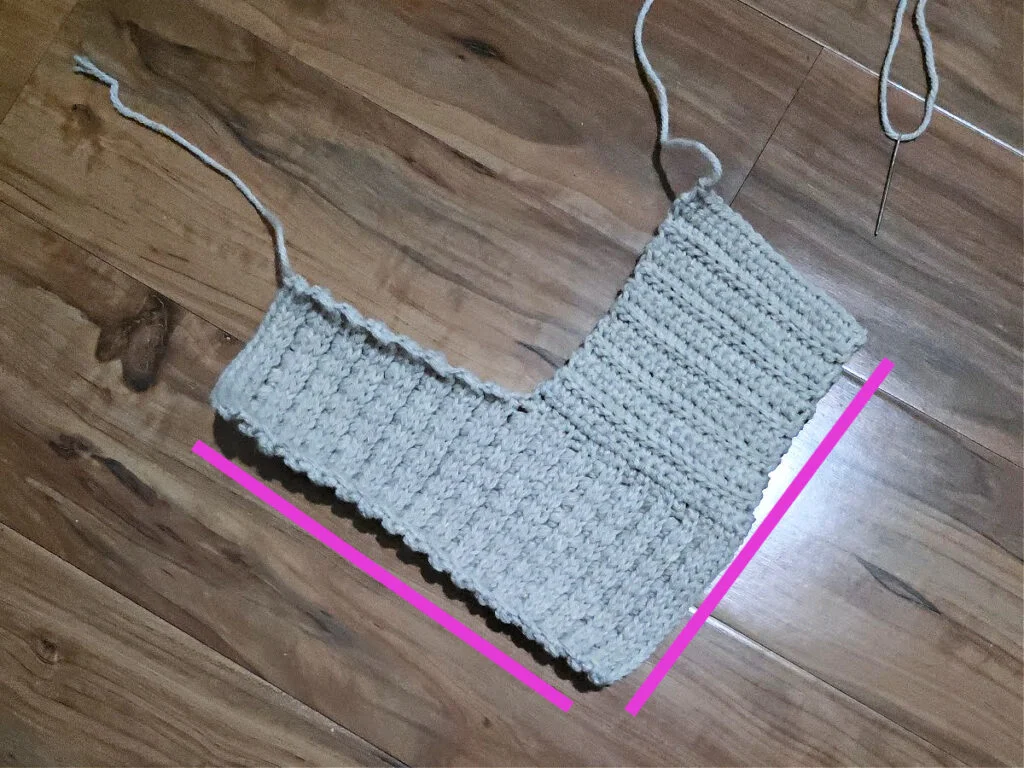
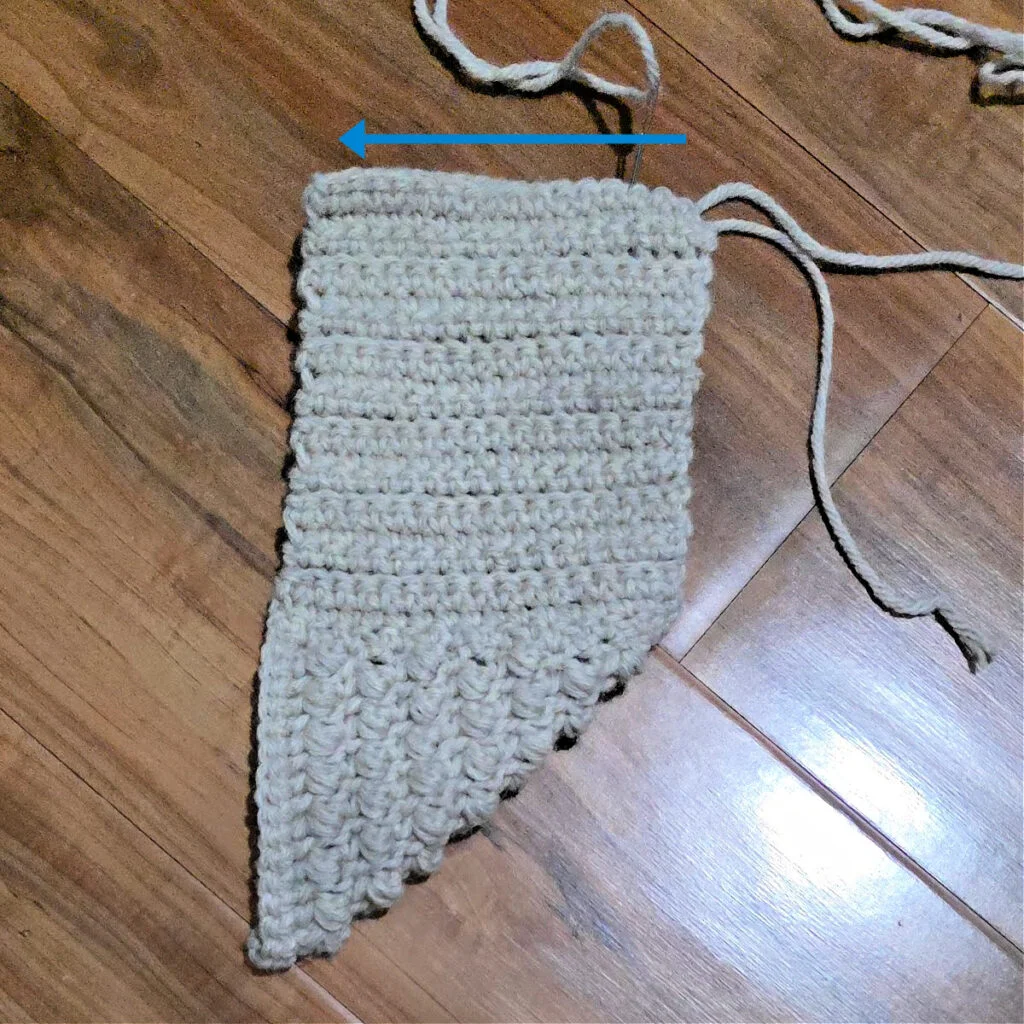
*Note: These two edges have a slightly different stitch count. Simply whipstitch the edges evenly.